![]()
Django {% %} Tags: What does {% %} mean in Django?
Django provides several built-in tags that help achieve additional processing on a webpage that would not be possible with plain HTML.
Django tags have the following syntax: {% tag %}, where each tag is encloses within {% %} characters.
{% %} means that you’re defining a template tag in a Django template file, a .html file. {% %} allows you to introduce control flow functionality, render text on a web page, include some external information into the template, and create links for web pages and static file resources, among many other functionalities.
Django {% %} is the syntax used in instructing Django to do extra processing in an HTML file other than the usual functionality available for HTML language.
Whenever you want to include some server processing, such as looping through an array in an HTML file, you use {% %}, which encloses tags associated with conditional looping functionality.
For example, the {% for %} tag is used for iteration in Django.
Because we cannot include the keyword ‘for’ in plain HTML, we use {% %} to enclose the tag, {% for %}, and let Django know that there is some extra processing that needs to be done.
What is a template tag, {% %}, in Django?
Django template tags help insert an expression that induces extra processing in HTML web pages. Template tags allow you to perform some programming on the application server, such as error checking or conditional processing, before sending the HTML to the client.
In general, Django {% %} template tags are used for
- Creating links on an HTML file,
- Extending functionality of a parent HTML file,
- Inserting dynamically rendered text or file location into a template,
- Writing conditional statements such as if statements in an HTML file,
- Inserting conditional loops functionality in an HTML file,
- Configuring Django forms to prevent malicious attacks.
Let’s see in detail how each functionality provided by Django’s {% %} tags works for a web development project.
{% %} help create links in a template file ({% url named_url %})
The {% url link %} is the syntax used to create links to other parts of your Django web pages in an HTML file.
Thus, the {% url %} is used to instruct Django to look for the associated named URL in the app-level and project-level URL configuration files. If the named URL matches any URL pattern defined in your urls.py files, the user is redirected to the URL upon clicking on the link.
As a convention, you should use named URLs for the {% url %} tag instead of hard coding the URLs yourself. Thus, you must supply it with the named URL you wish to redirect the user to.
Here’s how you create links in Django templates using the {% url %} template tag:
First, you should have an already defined URL or create the URL if you do not have it declared.
For this example, you will create a link redirecting the user to the blog page.
Create the URL
path('blog/', BlogPostListView.as_view()),
If you have noticed, the above URL is not named. Thus, create a named URL for the URL by adding the extra ‘name’ argument.
path('blog/', BlogPostListView.as_view(), name='blog_posts'),
Open the template file you wish to insert a link using the {% link %} template tag and add the following code.
<!--                supply named URL here as the argument -->
    <a href="{% url 'blog_posts' %}">Blog</a>
Note: I have supplied the named URL used for the blog page URL we created earlier.
Now, if you open the web page using the template you have inserted the link, you should see the blog page URL link displayed. You should be redirected to the blog page if you click on the link.
You can also use the [% url %} to redirect to a specific object.
For example, you can redirect to a particular blog post stored as a database object. To do that, you need to supply the named URL for the object DetailView view and the primary key or slug used in the URL parameter.
Here’s an example of creating a link to a blog post using the id parameter
<a href="{% url 'post_detail' post.pk %}" >{{ post.title }}</a>You can also use a slug parameter
<a href="{% url 'post_detail' post.slug %}" >{{ post.title }}</a>{% %} are used to achieve template inheritance ({% extends ‘base.html’ %})
Django template engine provides template inheritance functionality that allows you to create a ‘main’ HTML template with all the unique elements or formatting you wish to remain consistent across your website.
Thus, if you wish to create a themed page and layout consistent throughout your site, Django template inheritance can help you with that.
Besides, you can create blocks within specific areas of your main template file, which the templates inheriting the main template file, child templates, can replace with specific data.
How to inherit HTML file in Django?
Step 1: Create the ‘main.html’ or ‘base.html’ file you wish to inherit.
This base HTML file is referred to as the parent template. As a naming convention, you should name the parent template base.html for site-wide formatting and theming.
For other parent files, you can give them any name you wish.
So, create the file, base.html, and define all the elements and blocks you wish to include. The site-wide base.html file should be created in your project-level templates directory.
touch templates/base.htmlDefine the elements and blocks. Here’s an example:
<!DOCTYPE html>
<html lang="en">
<head>
    <meta charset="UTF-8">
    <script src="https://cdn.jsdelivr.net/npm/[email protected]/dist/js/bootstrap.bundle.min.js" integrity="sha384-ka7Sk0Gln4gmtz2MlQnikT1wXgYsOg+OMhuP+IlRH9sENBO0LRn5q+8nbTov4+1p" crossorigin="anonymous"></script>
    <title>
        <!-- block for defining the title of each page       -->
        {% block title %}

        {% endblock %}
    </title>
</head>
<body>
    <!-- Block content for placing the article, aside, divs, e.t.c HTML tags-->
    <div class="container-fluid">
        {% block content %}

        {% endblock %}
    </div>

    {% block footer %}

    {% endblock %}
    <script src="https://cdn.jsdelivr.net/npm/[email protected]/dist/js/bootstrap.bundle.min.js" integrity="sha384-ka7Sk0Gln4gmtz2MlQnikT1wXgYsOg+OMhuP+IlRH9sENBO0LRn5q+8nbTov4+1p" crossorigin="anonymous"></script>
</body>
</html>
Step 2: Use the extends tag to inherit the parent template into the child template
After creating the parent template, you can include all the elements and blocks defined within your child template using the {% extends ‘parent_html_file’ %} syntax.
The {% extends %} tag allows you to inherit everything from the base template file, including the formatting and blocks.
To inherit the above ‘base.html’ in a child template, say blog/list.html, add {% extends ‘base.html’ %} at the top of your /blog/list.html
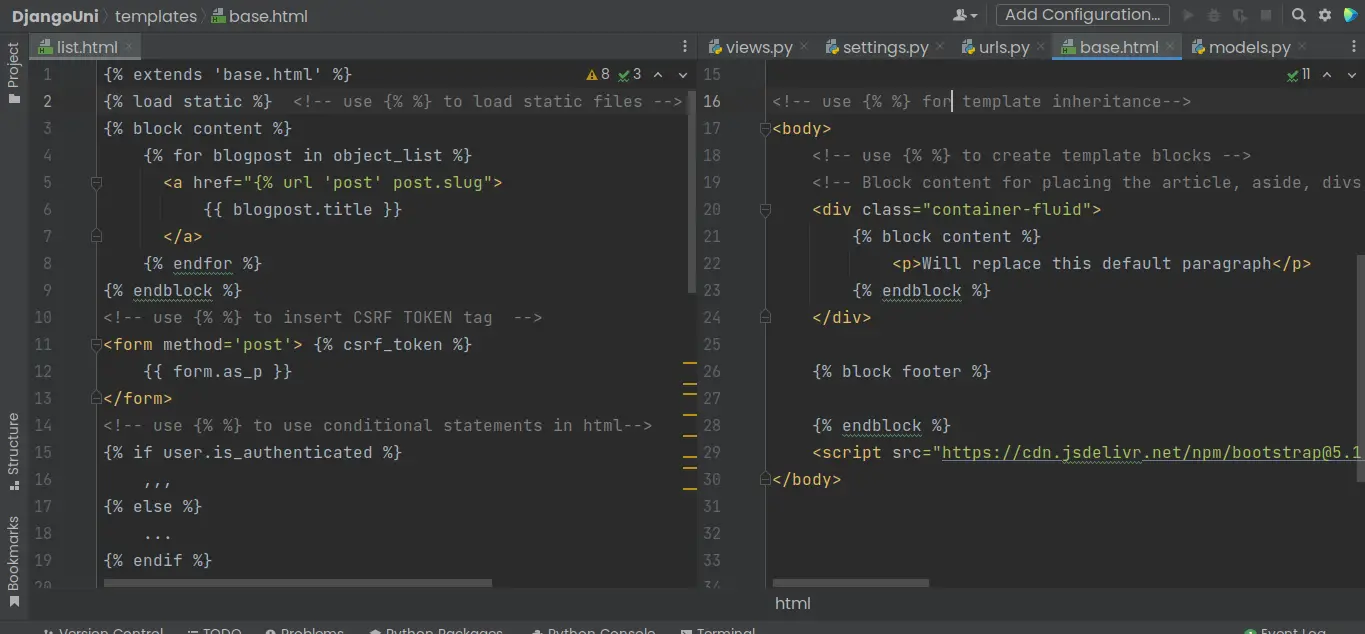
{% extends 'base.html' %}
After adding the {% extends ‘base.html’ %} tag, you have access to all the elements and blocks defined in your base.html template file.
{% extends 'base.html' %}

{% block title %} My Blog {% endblock %}

{% block content %}
    {% for blogpost in object_list %}
        <ul class="list-group list-group-flush">
          <li class="list-group-item"><a href="#">{{ blogpost.title }}</a></li>
        </ul>
    {% endfor %}

<!--                supply named URL here as the argument -->
<!--    <a href="{% url 'blog_posts' %}">Blog</a>-->

{% endblock %}
Note that I have used Bootstrap classes and blocks defined in the base.html file. I do not need to load Bootstrap again within my child template.
So, the {% extends %} is a template tag used to achieve template inheritance in Django. The tag follows the {% extends ‘template_to_extend’ %} syntax.
Use {% %} to insert static files locations ({% static ‘location_of_css_file’ %})
Another Django {% %} tag is the load static used to instruct the Django template engine to use the static files such as.css, .js, and image files in the static folder. The main use of the {% load static %} tag is to include CSS, JS, and logo files within your Django project templates.
So, use {% load static %} tags to embed links for static files found in your static files folder of your Django project.
Here’s an example code implementation loading a .css file in your template.
How to load a CSS file in Django?
Step 1: Place the CSS file inside the static/css/ directory inside your app directory
touch static/css/style.cssStep 2: Add {% load static %} line at the top of the current template file
Adding {% load static %} line instructs the Django template engine you will load some static files in the current template file.
{% load static %}Step 3: Reference the desired .css file using the {% static ‘css_file’ %} syntax
Reference the static file, using the {% static ‘location_of_the_css_file’ %} syntax.
<link href="{% static 'css/style.css' %}" rel="stylesheet">Write conditional statements in an HTML file using {% if %}
If you wish to write conditional statements such as checking whether something exists or if an error occurs in a .html file, you can do that using the {% if %} tags provided by Django.
{% if %} tags must be ended with the {% endif %} tag.
The if-else statements are used as conditional statements that runs some set of statements depending on whether an expression is true.
A block of code is executed if a condition is true. Otherwise, a separate code is executed if the condition is false.
How to use if else in Django templates?
In Django, if-else statements are commonly used to check:
- If a user is logged in and authenticated
- Display some data, pages, or links depending on the user that is logged in
- Performing extra custom conditional functionality
Here’s an example code used to check if the current user is authenticated:
<nav class="navbar navbar-expand-lg navbar-dark bg-dark">
     {% if request.user.is_authenticated %}
        <li class="nav-item">
          <a class="nav-link mx-1" href="/account/profile/">{{ user.username }}</a>
        </li>
        <li class="nav-item btn-danger ">
          <a class="nav-link text-white " href="{% url 'logout' %}">Logout</a>
        </li>
     {% else %}
        <li class="nav-item">
          <a class="nav-link" href="{% url 'login' %}">Login</a>
        </li>
        <li class="nav-item">
          <a class="nav-link" href="/account/register/">Register</a>
        </li>
    {% endif %}
</nav>
{% %} can be used for looping through items in a list or dictionary
When using context variables that hold more than one item, you can use the {% for %} tag loop to iterate through each item and display it on a web page.
The following syntax is used when iterating through a context dictionary in Django templates: {% for variable in your_list or your_dictionary %} {{ variable }} {% endfor %}. {% for %} tags must be ended with the {% endfor %} tag.
Example syntax:
{% for book in books %}

    {{ book.name }}

{% endfor %}
Let’s say you have stored some fruits in your database and want to show each fruit using a list on a web page.
With that in mind, you should retrieve all the fruits in your database using objects.all() method in your view, add the queryset to the context dictionary and finally loop through each fruit in an HTML file by referencing the context dictionary variable.
Here’s the step-by-step approach to iterating items in a context dictionary using the fruit analogy:
So, you have a bunch of fruits in your database created using the following model class
class Fruit(models.Model):
    fruit_name = models.CharField(max_length=100)
In your view, you retrieve all the fruits and store them in a context variable that will be sent to the HTML file to render all the fruits.
def all_fruits_view(request):
    # retrieve all the fruits objects
    fruits = Fruit.objects.all()
    # create a context variable, fruits,
    context = {
        'fruits': fruits,
    }
    # define the HTML file used to render the data
    template_name = 'fruit/list.html'
    # return the template and the context data using the render method
    return render(request, template_name, context)
Create the required HTML file, fruit/list.html, within the app-level templates directory or the project-level directory.
touch fruit/list.html

OR

touch templates/fruit/list.html
Within the template file, use the {% for %} tag to iterate through the fruit items, store the current fruit item in a variable, and display the variable to the user.
{% for fruit in fruits %}

    {{ fruit.fruit_name }}

{% endfor %}
Then create the URL, in your app-level URL configuration file, that the users will use to access and view all the fruits in the database.
path('fruits/', all_fruits_view),
Access, http://127.0.0.1:8000/fruits/, and voila!
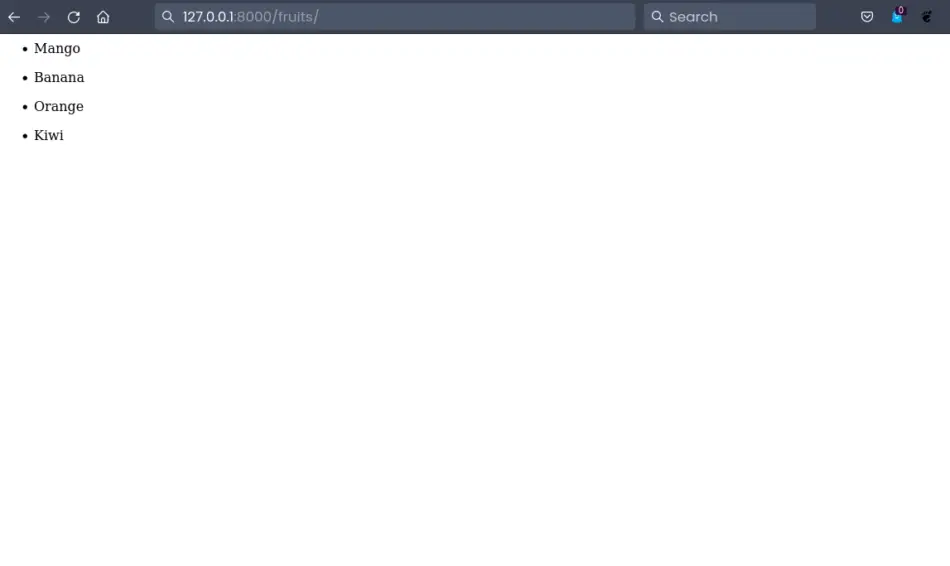
Looping through items in a Django template using the {% for %} template tag is as easy as that.
Configure Django forms to prevent malicious attacks with {% csrf_token %} tag
When rendering Django forms to the front end and requiring users to send data through GET and POST methods, you must load the CSRF token.
CSRF token prevents malicious attacks by cross-checking an automatically generated token created when loading a page containing a form with the token sent with the requests coming back.
If the tokens mismatch or lack in the request, Django does not execute or process the request.
To use the CSRF token in Django, you must wrap the csrf_token tag with the curly brackets and percent signs, {% %}. Thus, the CSRF token is provided in Django using the {% csrf_token %} tag.
Here is an example form using the {% csrf_token %} tag.
<!-- insert your CSRF TOKEN tag here -->
<form method='post'> {% csrf_token %}
    {{ form.as_p }}
</form>
The CSRF token that Django uses is stored in the server. For each request made to your Django application, the CSRF token is stored within the header in a POST parameter.
Django uses the token on the server to verify it against the token sent over within the request.
Related Questions
What is the difference between tags and filters in Django?
| Django tags | Django filters |
| Tags help add extra functionality to a Django template. Thus, template tags change the way a Django template is parsed. | Filters help insert rendered data returned as variables from the Django view. Besides, filters provided extra processing and formatting for the rendered data. |
| Tags can take one or more arguments | Template filters can take one or more arguments. |
| Tags are enclosed within {% %} characters | Filters are enclosed within double curly braces {{ }} |
| Most of the tags can span across multiple lines | Filters are written in one line |
| Some tags that span across multiple lines, such as {% for %}, must be ended with the ‘end’ keyword. For example, the {% for %} tag must be terminated with the {% endfor %} tag | Filters do not need to be ended because they are used in one line |
| Examples of Django template tags are {% for %}, {% block %}, {% with %}, {% url %}, {% load %}, e.t.c | Examples of Django’s built-in template filters are upper, truncatewords, time, slugify, slice, pluralize, lower, linebreak, and escape, among many others. |
What is the difference between include and extends in Django?
| include {% include “” %} | extends {% extends “” %} |
| Render a subtemplate within a Django template. Thus, you render a whole template file within a section of a particular Django template file using the {% include %} tag. | Used for template inheritance where the parent template elements and blocks are used in a child template. |
| Processes a partial template | Processes a full parent template |
| The Django template engine does not grab any block within the partial template file. | Django grabs all the elements and blocks used in the parent template. |
How do I use block content in Django?
You can use the block content to override specific parts of a parent template within your child templates. The {% block %} {% endblock %} is the syntax for declaring a block in Django templates. To provide a name for each block, you can specify it after the keyword block.
You can override these blocks in your child templates by referencing them by their names.
Here’s the syntax used to name a Django template block:
{% block content %}

{% endblock %}
This example uses the word ‘content’ to name a block. You can name the block any name you want. Mostly, you will find the main content page named ‘content.
You can have more than one block in a single Django template. When you have more than one block in a template, you should provide a name for each block.
You can also supply the name of the block when terminating a block. The approach help identify where each block ends easily.
{% block title %}

{% endblock title %}

{% block content %}

{% endblock content %}
Therefore, here’s how to create a block named content in a parent template and use it in a child template.
In parent template:
{% block content %}
    <p>Will replace this default paragraph</p>
{% endblock %}
In the child template, you can override the default paragraph within the content block like this:
{% block content %}
    <p>New paragraph from the child template</p>
{% endblock %}
What does {% endblock %} mean?
{% endblock %} instructs the Django template engine the end of a block or placeholder that child templates can use to fill in.

