![]()
What is __str__ in Django? (How it works and helpful code examples)

In Django, or any other programming language or framework, objects are essential because they allow us, programmers, to represent real-world cases and items in code. However, upon creating an object, the computer doesn’t give us much of a human-readable or descriptive name of that object. Therefore, we must perform a string representation to achieve a more descriptive title of an object being represented.
What is __str__ in Django model?
We use the str() method in Python to achieve string representation, a more descriptive name/title, for any of our objects. Without string representation, especially for a class object, a program returns the memory address of that object. For example, if we were to create an object from a Student class and print the object, we would get something like this:
Student class code:
class Student:

    def __init__(self, name, course):
        self.name = name
        self.course = course


student1 = Student("Steve", "Computer Science, Baby!")

print(student1)
Results after running the program:
<__main__.Student object at 0x7f77b4181d20>Well, that is not a descriptive name for our object.
What is the purpose of __str__() dunder method?
Pythonically, adding a dunder str method to our Student class should ‘spice’ the object up and provide us with a more descriptive title of our student object. Adding a dunder str method to our Student class allows us to return a string output instead of a memory address.
Improved Student class:
class Student:

    def __init__(self, name, course):
        self.name = name
        self.course = course

    def __str__(self):
        return f"{self.name} loves taking {self.course}"


student1 = Student("Steve", "Computer Science, Baby!")

print(student1)
The result is a more descriptive object represented as a string instead of a memory address:
Steve loves taking Computer Science, Baby!A dunder method, is a special method in Python used in classes following a pattern __something__. For example, we used __init__ to initialize student name and course every time we create a student object instance. Thus, each object initialized will have its own instance variable. Same, with the __str__ method.
So, we have seen how we can represent objects in the form of strings in a more basic code implemented in Python. But Steve, the article’s title entails __str__ method in Django.
Well, surprisingly, the same code and concepts are used in Django to return a string representation of our Django objects. Mostly, you will use the __str__ method when creating Django models. Thus, you will be required to return more descriptive names in admin interfaces in Django.
So,
What is __str__ in Django?
__str__ is a special method defined inside a class so that Python automatically calls the function to provide an object represented as a string. Thus, whenever another function calls the object, it is returned as a string instead of a memory address. Mostly, you will use the __str__ dunder method in Django models and return each object with a descriptive name of the item’s title stored in the database.
For demonstration, let’s create a new Django project and implement the __str__ method to see how it works and hopefully understand it better.
How to create a new Django project using __str__ method in app models
Follow these steps to create a new project for demonstrating how __str__ method is used in Django:
Step 1: Install or update Python
Run the following commands to install or update Python to the latest version.
sudo apt update

sudo apt install python3
Step 2: Create a new virtual environment
Type the following command to create a new Python virtual environment:
python -m venv ~/.virtualenvs/DjangoSTREnvStep 3: Activate the virtual environment and install Django
You need to use the source command to activate the Python virtual environment. Run the following command on the Terminal:
source ~/.virtualenvs/DjangoSTREnv/bin/activateThen, install Django and its dependencies
pip install djangoStep 4: Create a folder to store your Django project code and assets
Open the Terminal and type the following to create a new directory inside the Desktop folder:
mkdir ~/Desktop/DjangoLearnProject Step 5: Create a new Django project
Type the following in the Terminal to start a new Django project. Ensure you have activated your virtual environment. Otherwise, you will get Django not found error.
django-admin startproject DjangoELearning .Check this article that illustrates how to install Python, create a new virtual environment, and install Django in detail.
Step 6: Open your new Django project with your favorite IDE or code editor.
I like to use Visual Studio Code to edit my Django code or Pycharm as an IDE. Visual Studio Code is a software you can use to write and edit your Python and Django code.
code .After creating a new Django project and opening the project directory with your favorite IDE or code editor, create a new Django app that we’ll use to create Django models and see string representation in work.
Step 7: Create a new Django app
Type the following command to create a new Django
python manage.py startapp coursesRegister your new app in settings.py. Edit the settings.py file of the DjangoELearning project and add courses to the INSTALLED_APPS variable:
# Application definition

INSTALLED_APPS = [
    'django.contrib.admin',
    'django.contrib.auth',
    'django.contrib.contenttypes',
    'django.contrib.sessions',
    'django.contrib.messages',
    'django.contrib.staticfiles',

    'courses',
]
After registering the courses application, let’s write some code by creating a new subject model.
Step 8: Create a new Django model
Open models.py of the courses app and add the following code:
from django.db import models

# Create your models here.
class Subject(models.Model):
    subject_title = models.CharField(max_length=250)
    subject_code = models.CharField(max_length=10)
Let’s keep it as simple as this. After creating the Subject models, you should create the migration for the courses model. Type the following command on the Terminal:
python manage.py makemigrationsTo apply these migrations to the database, run the migrate command. Type the following on the Terminal.
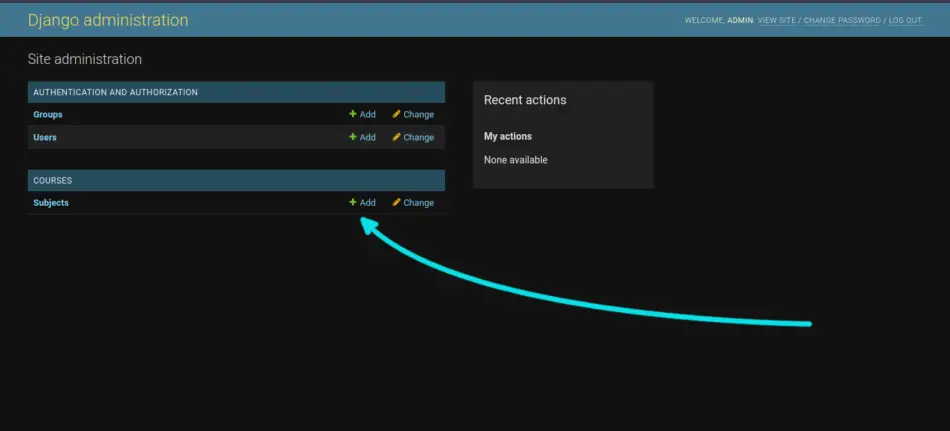
python manage.py migrateTo see each subject object, once we log into the admin panel, we must register the courses models. To do that, edit the admin.py file of the courses app. Add the following code to the courses/admin.py file:
from django.contrib import admin

# Register your models here.
from .models import Subject

admin.site.register(Subject)
Now we should be able to see the subjects in the administration panel of our Django project.
Because we have not created an admin account, we must create one to be able to log in to the admin page of our Django project. To do that, create a new superuser account by running the following command:
python manage.py createsuperuserFill in the information.
Finally, run the Django development server and login into the admin panel of our project.
python manage.py runserverOpen http://127.0.0.1:8000/admin/ in your browser. Login with the details that you provided when creating your superuser account.
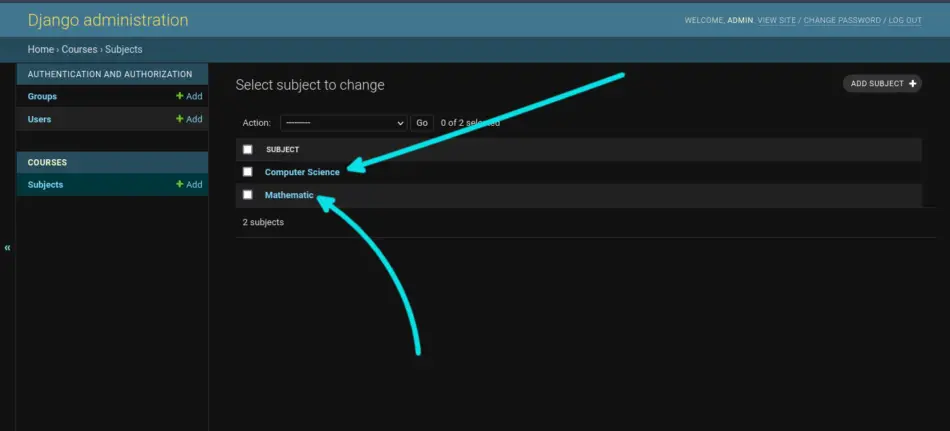
Create new subject objects and see how Django display them in the admin panel.
As you may have noticed, Django displays our subject objects in a non-descriptive format so that a user cannot be able to know the subject name.

This is where the power of the dunder str method comes in.
How to display descriptive names of Django model objects using __str__ method
To display more descriptive names for our subject objects, we need to add a new instance dunder method to our Django project’s Subject class.
How to add __str__ dunder method in Django model
Follow these steps to add __str__ method in any of your Django models:
Step 1: Open models.py of the app you wish to add __str__ dunder method
To do that, open models.py of our courses app and adjust the Subject class to reflect this:
from django.db import models

# Create your models here.
class Subject(models.Model):
    subject_title = models.CharField(max_length=250)
    subject_code = models.CharField(max_length=10)

    def __str__(self):
        return self.subject_title
We have added
    def __str__(self):
        return self.subject_title
to our Subject model so that Django will return the object as a string representation. We have used subject_title as the descriptive name for each subject object.
Step 2: Save your models.py file and refresh the admin page
Refresh the admin page, http://127.0.0.1:8000/admin/courses/subject/, and you should see more descriptive names for our subjects’ titles.
And voila! You should see more user-friendly names for our courses object, and you can identify each subject by its title.
From the demonstration and actually having created a new Django project, registered a new app, and created a new Django model, using the __str__ method should now be easy for you.
Whenever you create model objects, creating the dunder str methods should become easy because you have a basic understanding of the instance method Pythonnically and Djangonically. Is there such a word as “Djangonically?” But you get the point.
Implementing Django models __str__ method follows the same syntax used in Python. Thus, we literally use Python __str__ function code as an instance method for our Django models. In the end, we can return more descriptive titles for our objects in the admin pages by using def str(self) in Django models.
Related Questions and Troubleshooting
How to return multiple fields in Django __str__ method
You may use a string concatenation or an f-string to return multiple fields as a descriptive title for each Django model object. To do that, you just have to use an f-string syntax similar to that of Python. Here is an example code returning the descriptive name of an object using subject_title and subject_code fields.
    def __str__(self):
        return f"{self.subject_title}, {self.subject_code}"
As a reference to the Django project we created above, our Subject class should look like this:
from django.db import models

# Create your models here.
class Subject(models.Model):
    subject_title = models.CharField(max_length=250)
    subject_code = models.CharField(max_length=10)

    def __str__(self):
        return f"{self.subject_title}, {self.subject_code}"
Here, we return multiple fields in our Django __str__ method. Take a look at the admin panel; you should see the subject name displayed with the subject code. Whatever fields you have defined in your Django model, you can use one or more of these fields as descriptive names for each instance object using the Django __str__ dunder method.
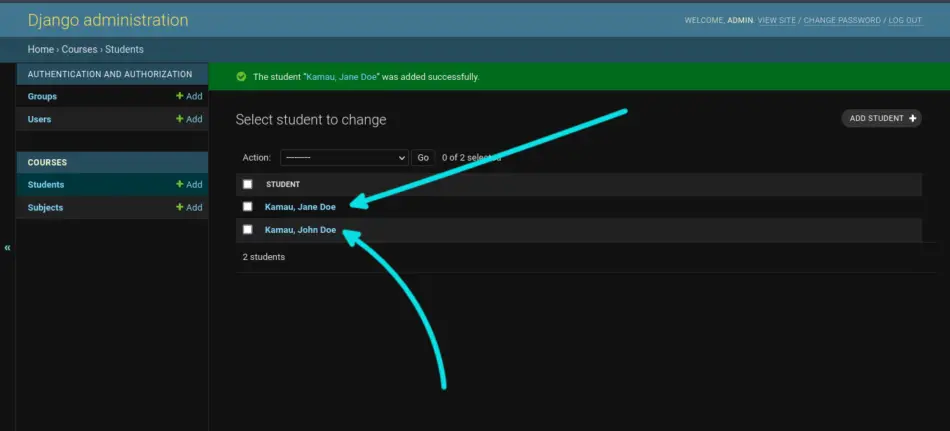
Here is a common case for returning all three names of a Student object:
class Student(models.Model):
    first_name = models.CharField(max_length=25)
    middle_name = models.CharField(max_length=25)
    surname = models.CharField(max_length=25)

    def __str__(self):
        return f"{self.surname}, {self.first_name} {self.middle_name}"
Here, we use multiple fields, first_name, middle_name, and surname, to return a full descriptive name of a student object using the Django __str__ method. Take a look:
How to define __str__ method for a foreign key field in Django
You may define the __str__ method returning the descriptive name of that instance object you are using the Foreignkey from, or you may reference the exact field name you use as a foreign key.
Here is an example of what I mean:
You may define the __str__ method in the class you have your Foreignkey defined:
Let’s say you have these classes, Subject, and Student, and you want to add the subject field to your student object with a foreign key. Then, you would write the code as follows:
from django.db import models

# Create your models here.
class Subject(models.Model):
    subject_title = models.CharField(max_length=250)
    subject_code = models.CharField(max_length=10)


class Student(models.Model):
    first_name = models.CharField(max_length=25)
    middle_name = models.CharField(max_length=25)
    surname = models.CharField(max_length=25)
    subject_taking = models.ForeignKey(Subject, on_delete=models.CASCADE)

    def __str__(self):
        return f"{self.surname}, {self.first_name} {self.middle_name} takes {self.subject_taking}"
After running the migrations, registering the Student class in the admin.py, and opening your admin panel, you should notice that the names of our subjects are not descriptive or user-friendly.

To resolve this, you may define the __str__ method in the Subject class. Thus, you end up returning a descriptive name for the subject objects. The final Subject class code should look like this:
class Subject(models.Model):
    subject_title = models.CharField(max_length=250)
    subject_code = models.CharField(max_length=10)

    def __str__(self):
        return self.subject_title
By adding,
    def __str__(self):
        return self.subject_title
Django automatically uses the subject name as defined in the __str__ method for our foreign key. Open http://127.0.0.1:8000/admin/courses/student/, and voila!

OR
You may reference the field name of the foreign key:
Here, you will reference the field name to return the descriptive name of the foreign key if it is not defined. Thus, you will have to reference the instance object first and then the field name.
As an example, in the Course class, remove or comment out the __str__ method and adjust the Student class to reflect this:
class Student(models.Model):
    first_name = models.CharField(max_length=25)
    middle_name = models.CharField(max_length=25)
    surname = models.CharField(max_length=25)
    subject_taking = models.ForeignKey(Subject, on_delete=models.CASCADE)

    def __str__(self):
        return f"{self.surname}, {self.first_name} {self.middle_name} takes {self.subject_taking.subject_title}"
After adjusting and opening the admin page, you should see the same results.
from django.db import models

# Create your models here.
class Subject(models.Model):
    subject_title = models.CharField(max_length=250)
    subject_code = models.CharField(max_length=10)


class Student(models.Model):
    first_name = models.CharField(max_length=25)
    middle_name = models.CharField(max_length=25)
    surname = models.CharField(max_length=25)
    subject_taking = models.ForeignKey(Subject, on_delete=models.CASCADE)

    def __str__(self):
        return f"{self.surname}, {self.first_name} {self.middle_name} takes {self.subject_taking.subject_title}"
That’s how you can use foreign key fields in Django __str__ method.
How to fix def __str__(self) Django not working
If you have a Django __str__ not working, most likely, you are referencing a field that is not in your class model.
Besides, you may have misspelled the field name you are using as a descriptive name in your __str__ method.
Another scenario is that you may not have run your migrations before using the field names.
Thus, you should double-check that you have correct and existing field names. Check your filed name typo. If you have not run your migrations, run the following commands to do so:
python manage.py makemigrations && python manage.py migrateAnother interesting reason why your __str__ dunder method may not be working is due to a syntax typo in your dunder method. Check that you have two underscores on each end of the str keyword. Or copy my Django __str__ method code.
def __str__(self):Conclusion
Django __str__ is a dunder method commonly used in Django model classes to return descriptive names or titles for objects stored in the database. The Django __str__ method works pretty much the same as Python’s __str__ method. Both have the same syntax.
And that’s it for this tutorial. I hope you have enjoyed it and come out as a more experienced Django Dev!
Heave Ho! to your next amazing Django app. For more information on how to use Django and databases to save data, check this article I have prepared.
See ya!

