![]()
Ultimate guide on {% include %} and {% extends %} tags in Django templates

One of the key features that Django provides is its template system, which allows you to separate the presentation layer from the logic layer of your Django web application.
The template system provides a number of powerful tools for creating reusable and flexible templates, including the {% include %} and {% extends %} tags.
{% extends %} is used to specify what parent template the current template should inherit from.
Let’s say that you have a common header and footer code that you want to reuse in multiple templates, you could create a parent template that includes the header and footer code and then extend that template in child templates of your web application.
You can have a parent template (base.html) that look like this:
<!DOCTYPE html>
<html lang="en">
<head>
    <meta charset="UTF-8">
    <meta http-equiv="X-UA-Compatible" content="IE=edge">
    <meta name="viewport" content="width=device-width, initial-scale=1.0">
    <title>My website</title>
</head>
<body>
    <!-- header code here -->
    <header>
        <h1>My unique website header</h1>
    </header>

    <!-- footer code here -->
    <footer>
        <p>mywebsite.com</p>
    </footer>
</body>
</html>
Then, in your child templates, you can use the same styling of the parent template, reflecting the header and footer HTML content.
For example, in your index.html, you can inherit the whole base.html content like this:
{% extends 'base.html' %}


<p>My homepage</p>
By using {% extends ‘base.html’ %}, your index.html will have the same HTML content defined in your base.html, including the header and footer code.
{% include %} is used to load a single template into another template. The template loaded into the current template can be considered as a reusable component that can be inserted into one or more templates.
Here’s an example implementation:
Let’s say you have a navigation menu that you may wish to be include in certain areas of your website, e.g in your publicly-accessible pages.
Then, you can have a custom navigation menu implemented in its own .html file. Whenever, you want to create a publicly-accessible page, then you can use the unique navigation by loading the whole template in your current template.
public_navigation.html
<nav>
    <a href="{% url 'home' %}">Home</a>
    <a href="{% url 'about' %}">About</a>
    <a href="{% url 'contact' %}">Contact</a>
</nav>
Then, if you wish your contact, home, and about pages to have this specific URL, you can include the
public_navigation.htmltemplate in your templates like this:<body> {% include 'public_navigation.html' %} ... </body>With this, the
public_navigation.htmlwill be included in your contact, home, and about pages as components that can be inserted anywhere in your HTML structure.
If you’re new to using Django template tags, {% extends %} and {% include %} tags can be a bit confusing at first.
But once you understand the difference between them and how they’re used, you’ll have the power to create dynamic and engaging web pages that meet the requirements of your web application.
Let’s delve into {% include %} and {% extends %} tags in Django templates and explore the differences between them, their use cases, and how you can use them to maximize the efficiency and reusability of your templates.
What is {% include %} in Django templates
{% include %} tag in Django templates is a way to include a template (HTML file) within another Django template. {% include %} allows you to reuse pieces of template code by incorporating them into a component that can be inserted anywhere in your template files or among many different templates. The approach helps reduce the amount of redundant code in your templates.
The {% include %} tag takes the name of the template to be included as an argument and inserts its content into the current template at the location where the {% include %} tag is defined.
For example, if you have a filename called, navigation.html, then the keyword navigation.html will be supplied to the {% include %} tag like this: {% include navigation.html %}
Using {% include %} template tags in your Django templates allow you to create reusable and modular templates, making it easier to maintain and update your application’s design and structuring.
When to use {% include %} in Django
Including the content of another template into a parent template can be useful when you have a piece of template code that you want to reuse in multiple places, such as a header, footer, or navigation menu.
By including the template code in multiple places using the {% include %} tag, you can reduce the amount of redundant code in your templates and make it easier to maintain and update your application.
Five places you can implement {% include %} tag in your Django application:
- Header and footer sections that can be used on the majority of web pages but not all of them.
- Navigation menu that is unique across multiple pages of your web application.
- A sidebar
- A carousel
- A pagination section
How to create and use {% include %} in Django templates
Follow these steps to create a .html file and include it in other .html files of your Django web application:
- Create the template file (.html file) in your app-level templates directory (app/templates) or project-level template directory (project/templates).
- Create the HTML content and styling for your newly created template file.
- Save the template file.
- Include the template file in another template file using
{% include 'template_filename' %}syntax
Here are the detailed steps to take to create a template and use it in your {% include %} template tag.
Step 1: Create a new template file in app-level or project-level templates directory
To achieve organization in your Django project and as a convention, you should place your .html files inside app-level and project-level template directories.
For the app-level template directory, you should create a directory named templates that exists within your app folder. Its corresponding configuration exists inside the settings.py file, in APP_DIRS variable. When set to True, Django will look for templates inside app-level template directories.
For the project-level template directory, you should create a directory named templates that exists within your project root folder. This is the directory that has your manage.py file. Its corresponding configuration exists inside the settings.py file, in DIRS variable. The variable takes a list of directories you want Django to look templates in.
In this example, add 'templates' to the list so that Django will load templates from the project-level templates directory.
TEMPLATES = [
    {
        "BACKEND": "django.template.backends.django.DjangoTemplates",
        # new line
        "DIRS": [BASE_DIR / 'templates'],
        "APP_DIRS": True,
        "OPTIONS": {
            "context_processors": [
                "django.template.context_processors.debug",
                "django.template.context_processors.request",
                "django.contrib.auth.context_processors.auth",
                "django.contrib.messages.context_processors.messages",
            ],
        },
    },
]
Here’s the command to create an app-level templates directory:
mkdir app_name/templates

# for a blog app, here's how you would create the directory
mkdir blog/templates
Here’s the command to create a project-level templates directory:
mkdir templatesFor a template that will be used across multiple apps in your Django project, it is best to keep the file inside the project-level template directory.
After creating the project-level template directory, create a new template file that will hold the HTML structure and content to be displayed across your website.
In this example, let’s create a navigation menu that will include links to home, about, and contact pages.
So, create a new file and name it navigation.html or any name
touch templates/navigation.htmlStep 2: Define HTML content and structure of the template to include
After creating the project-level template directory and the template file to include from, add the HTML content and structure to the file. In our navigation menu example, the file should look like this:
<header>
    <nav>
        <a href="/">Home</a>
        <a href="/about">About</a>
        <a href="/contact">Contact</a>
    </nav>
</header>
Save the file and that’s it.
Step 3: Include the new template component in other template files
After defining the HTML structure for the template file to include, you can use the template as a component in your other .html files. You can do that using the {% include 'template_file_name.html' %} syntax.
For the navigation menu component, you can include it in your home.html like this:
{% include 'navigation.html' %}After loading the home page of your Django application, you should be able to see that the HTML content and structure of the navigation.html is included in your template. With one line, you have included a whole .html code as a component that can be inserted anywhere in your .html code and across different template files.
What is {% extends %} in Django templates
{% extends %} is a template tag used in template inheritance where a parent template can be extended by a child template inheriting all the parent’s HTML content and structure. By using the {% extends %} tag in a child template, the styling of the parent page is reflected when accessing the page associated with it.
The {% extends %} template tag is always placed in a child template. You cannot have more than one {% extends %} tags in a child template.
When using the {% extends %}, you must supply an additional argument that specifies which base template the child template should inherit from. Here’s the correct syntax for implementing an effective template inheritance in a child template: {% extends 'base_file_name.html' %}. base_file_name.html is the name of the parent template. The name is supplied as an argument to the {% extends %} tag.
With that, you can be able to create modular and reusable template files which multiple child templates can inherit from. Due to modularity, the changes you make to a base template will always reflect automatically across all your child templates.
Thus, an effective template inheritance implementation will help you maintain a consistent look and feel across your web pages.
When to use {% extends %} in Django
Use {% extends %} when you want to:
- Achieve unique styling and structure that is consistent across all the web pages of your Django web application.
- Create sections of a web page that are consistent across your website. For example, a consistent footer structure that is visible to all the pages of your website.
- Achieve template blocks, which are sections that can be overridden by child templates.
- Separate HTML content and presentation where you separate content definition in child templates and defining the presentation in the base template.
- Reduce the amount of redundant HTML code used across your web application’s web pages.
How to create and use {% extends %} in Django templates
To create a template that can be inherited by child templates using the {% extends %} template tag, follow these steps:
- Create a project-level templates directory
- Configure Django to look for templates files inside the project-level templates directory
- Create a new parent template (base.html) inside the project-level templates directory
- Define the HTML structure for the base.html file including {% block %} tags
- Extends your parent template file, base.html, in your child template, e.g index.html
Here are the individual steps explained in detail:
1. Create a project-level templates directory
In your project root directory, create a new directory to store your parent templates. Name the directory, templates
mkdir templates2. Configure Django to look for templates files inside the project-level templates directory
After creating a project-level template directory, configure Django to load templates in this directory by opening the settings.py file, and set TEMPLATES > DIRS to `[BASE_DIR / ‘templates’.
TEMPLATES = [
    {
        "BACKEND": "django.template.backends.django.DjangoTemplates",
        # new line
        "DIRS": [BASE_DIR / 'templates'],
        "APP_DIRS": True,
        "OPTIONS": {
            "context_processors": [
                "django.template.context_processors.debug",
                "django.template.context_processors.request",
                "django.contrib.auth.context_processors.auth",
                "django.contrib.messages.context_processors.messages",
            ],
        },
    },
]
3. Create a new parent template (base.html) inside the project-level templates directory
In your project-level template directory, create a new parent file called, base.html:
touch templates/base.html4. Define the HTML structure for the base.html file including {% block %} tags
Open the parent template using your favorite IDE or code editor:
code templates/base.htmlDefine the HTML content and structure you wish to have across your website. In this example code, I have included Bootstrap 5 styling and navigation that will be consistent across my website:
<!doctype html>
<html lang="en">
  <head>
    <meta charset="utf-8">
    <meta name="viewport" content="width=device-width, initial-scale=1">

    <link href="https://cdn.jsdelivr.net/npm/[email protected]/dist/css/bootstrap.min.css" rel="stylesheet" integrity="sha384-EVSTQN3/azprG1Anm3QDgpJLIm9Nao0Yz1ztcQTwFspd3yD65VohhpuuCOmLASjC" crossorigin="anonymous">

    <title>My new awsome website</title>
  </head>
  <body>
    <nav class="navbar navbar-expand-lg navbar-light bg-light">
        <div class="container-fluid">
          <a class="navbar-brand" href="#">My Awsome Website</a>
          <button class="navbar-toggler" type="button" data-bs-toggle="collapse" data-bs-target="#navbarNavAltMarkup" aria-controls="navbarNavAltMarkup" aria-expanded="false" aria-label="Toggle navigation">
            <span class="navbar-toggler-icon"></span>
          </button>
          <div class="collapse navbar-collapse" id="navbarNavAltMarkup">
            <div class="navbar-nav">
              <a class="nav-link active" aria-current="page" href="#">Home</a>
              <a class="nav-link" href="#">About</a>
              <a class="nav-link" href="#">Contact</a>
            </div>
          </div>
        </div>
    </nav>
    <section class="home my-5">
        <div class="row">
            <div class="col-md-12 p-5">
                <h1>Hello, everyone!</h1>
            </div>
        </div>
    </section>

    <script src="https://cdn.jsdelivr.net/npm/[email protected]/dist/js/bootstrap.bundle.min.js" integrity="sha384-MrcW6ZMFYlzcLA8Nl+NtUVF0sA7MsXsP1UyJoMp4YLEuNSfAP+JcXn/tWtIaxVXM" crossorigin="anonymous"></script>

  </body>
</html>
After creating the HTML structure and styling of the base template, create a block using the {% block %} template tags. These blocks will act as placeholders where you can add customizable content in your child templates.
Here is an example block content that will hold the main contents that go inside the <body> HTML tag:
{% block content %}

{% endblock %}
So, your base.html example should look like this:
<!doctype html>
<html lang="en">
  <head>
    <meta charset="utf-8">
    <meta name="viewport" content="width=device-width, initial-scale=1">

    <link href="https://cdn.jsdelivr.net/npm/[email protected]/dist/css/bootstrap.min.css" rel="stylesheet" integrity="sha384-EVSTQN3/azprG1Anm3QDgpJLIm9Nao0Yz1ztcQTwFspd3yD65VohhpuuCOmLASjC" crossorigin="anonymous">

    <title>
        {% block title %}
            My awsome website
        {% endblock title %}

    </title>
  </head>
  <body>
    <nav class="navbar navbar-expand-lg navbar-light bg-light">
        <div class="container-fluid">
          <a class="navbar-brand" href="#">My Awsome Website</a>
          <button class="navbar-toggler" type="button" data-bs-toggle="collapse" data-bs-target="#navbarNavAltMarkup" aria-controls="navbarNavAltMarkup" aria-expanded="false" aria-label="Toggle navigation">
            <span class="navbar-toggler-icon"></span>
          </button>
          <div class="collapse navbar-collapse" id="navbarNavAltMarkup">
            <div class="navbar-nav">
              <a class="nav-link active" aria-current="page" href="#">Home</a>
              <a class="nav-link" href="#">About</a>
              <a class="nav-link" href="#">Contact</a>
            </div>
          </div>
        </div>
    </nav>
    {% block content %}
        <section class="home my-5">
            <div class="row">
                <div class="col-md-12 p-5">
                    <h1>Hello, everyone!</h1>
                </div>
            </div>
        </section>
    {% endblock %}
    <script src="https://cdn.jsdelivr.net/npm/[email protected]/dist/js/bootstrap.bundle.min.js" integrity="sha384-MrcW6ZMFYlzcLA8Nl+NtUVF0sA7MsXsP1UyJoMp4YLEuNSfAP+JcXn/tWtIaxVXM" crossorigin="anonymous"></script>

  </body>
</html>
Notice the {% block title %}, the block will be used to create unique titles for each page on our website.
Also, I have written default content to be displayed in each block when the child template does not override the block with its unique content.
5. Extends your parent template file, base.html, in your child template, e.g index.html
After defining the HTML structure of the parent template, you can now inherit it using the {% extends %} template tag in your child templates.
In this example, let’s have an index.html file that will be used to display the home page of your website.
touch templates/index.htmlWith the new child template file, inherit the parent template, base.html, by including the following line at the top:
In index.html:
{% extends 'base.html' %}Save the file and write a new view and URL endpoint for it. In this case /endpoint.
views.py (can create views.py file in your project directory or create a new app called home)
from django.shortcuts import render


def homepage(request):
    template_name = 'index.html'
    return render(request, template_name)
Project-level urls.py
from django.contrib import admin
from django.urls import path

from .views import homepage

urlpatterns = [
    path("admin/", admin.site.urls),
    path('', homepage, name='home'),
]
Run the Django development server and open http://127.0.0.1:8000/
./manage.py runserverAnd voila, you have the HTML styling of the base template loaded in your child template, index.html.
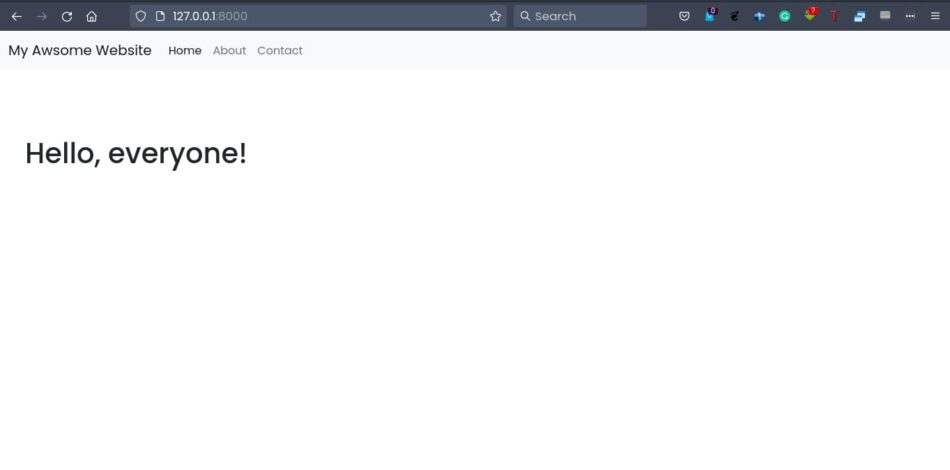
Easy peasy!
Implementing template inheritance and creating reusable templates is very straightforward in Django, as you have seen. With {% extends %} and {% include %} template tags, you can easily create reusable templates and components across your Django project.

