![]()
How to install Django and its dependencies in cPanel Terminal using pip
If you have a shared hosting account with access to Cpanel, you can easily install Django and its dependencies using pip, the package installer for Python.
The only thing that you need is to ensure that your hosting server runs on CloudLinux which provides you with the Setup Python Apps option for creating Python apps in your shared hosting account.
One perfect hosting service that supports Python apps is Namecheap. You should check it out.
If you cannot find the “Setup Python Apps” app in your Cpanel dashboard, you can always contact your hosting provider to see if they can activate it for you, if available.
After that, you can always follow these steps to ensure your Python Django web application works correctly.
How to install Django project requirements in cPanel using pip
A shared hosting account that has Cpanel gives you access to the Linux operating system running as your server operating system.
Because of that, the server operating system is just like your Desktop operating system running on any Debian-based operating system such as Ubuntu or Kali Linux.
Therefore, you have access to the Terminal application that you can use to access Python pip or pip3. Python pip3 is a package manager that allows you to install Python modules and packages such as Django in your system.
So, the goal of installing Django and its dependencies can be achieved easily by accessing the Terminal on your Cpanel server, navigating into the right directory that has your Python Django app, activating the virtual environment, and installing the Django.
Here is the detailed step-by-step process for installing Django and its dependencies in your shared hosting account using the pip command.
Step 1: Login into your Cpanel Dashboard for your Shared Hosting account
To access your cPanel dashboard, you will typically need to go to your web hosting provider’s website and log in with your account credentials.
Once you are logged in, you should see an option to access the cPanel dashboard.
Click on this option to open the cPanel interface.
From here, you can access various features and tools provided by cPanel, including the Terminal option that we will use in the later steps to install Django using pip.
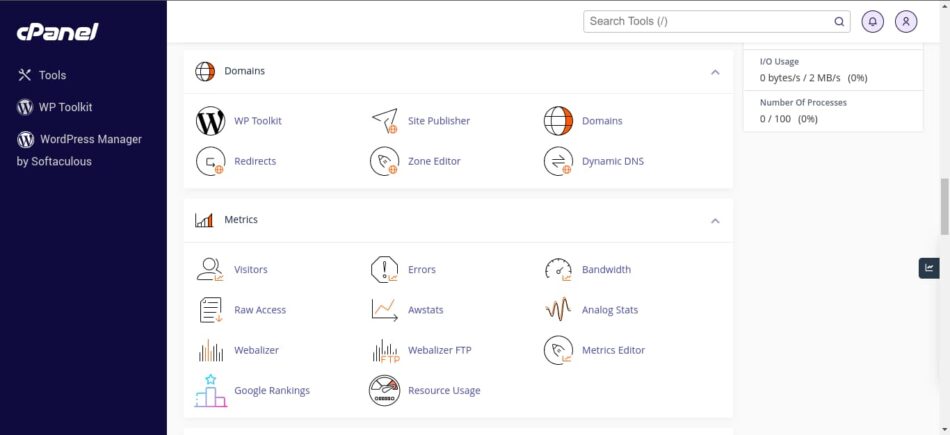
cPanel provides a graphical user interface (GUI) for managing your web hosting account, which includes various apps and tools that you can use to configure and customize your website.
One of these apps is “Setup Python App”, which is a tool that allows you to create and manage Python applications on your cPanel hosting account.
Step 2: Locate the “Setup Python App” app in your cPanel Dashboard
To locate the “Setup Python App” app in your cPanel dashboard, navigate to the “Software” section. Depending on the theme and layout of your cPanel account, the location of the “Setup Python App” app may vary.
However, it is typically located under the “Software” or “Web Applications” section.
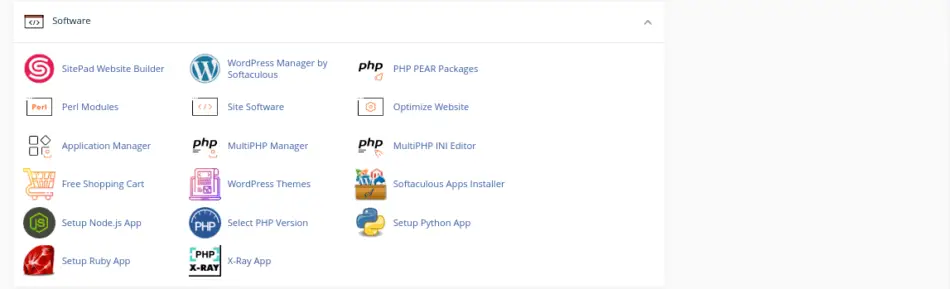
Once you locate the “Setup Python App” app, you can click on it to open the app’s interface. From there, you can create and manage Python applications, including Django projects, on your cPanel hosting account.
Step 3: Select the Python app you wish to install Django for
In the “Setup Python App” app in your cPanel dashboard, you can create and manage multiple Python applications on your hosting account.
Each Python application can have its own environment and dependencies, making it easy to manage and deploy multiple projects on a single hosting account.
To install Django for a specific Python app, you need to select that app in the “Setup Python App” interface by clicking on the edit (pencil icon) icon of the app in the app list.
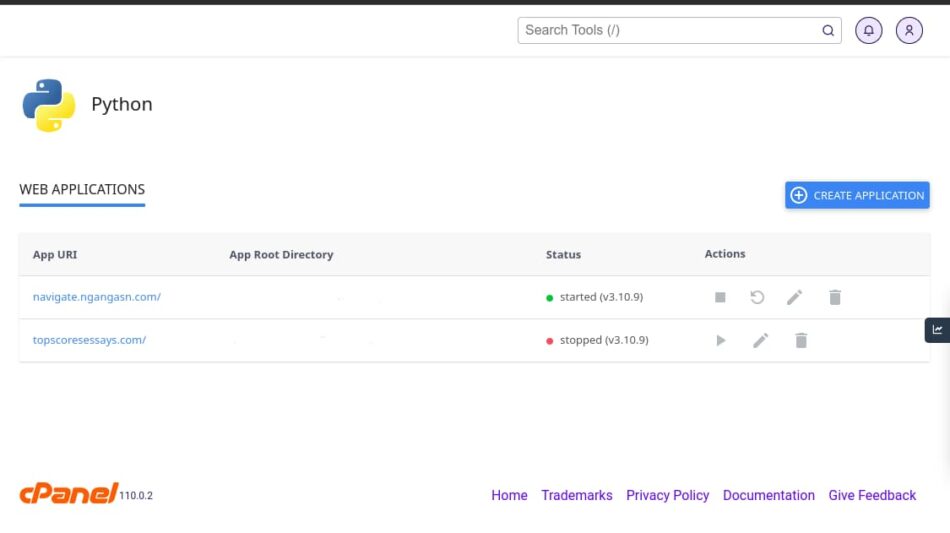
Once you select the app, you will be taken to a configuration page where you can set up the app’s environment, the Python version required, and environment variables.
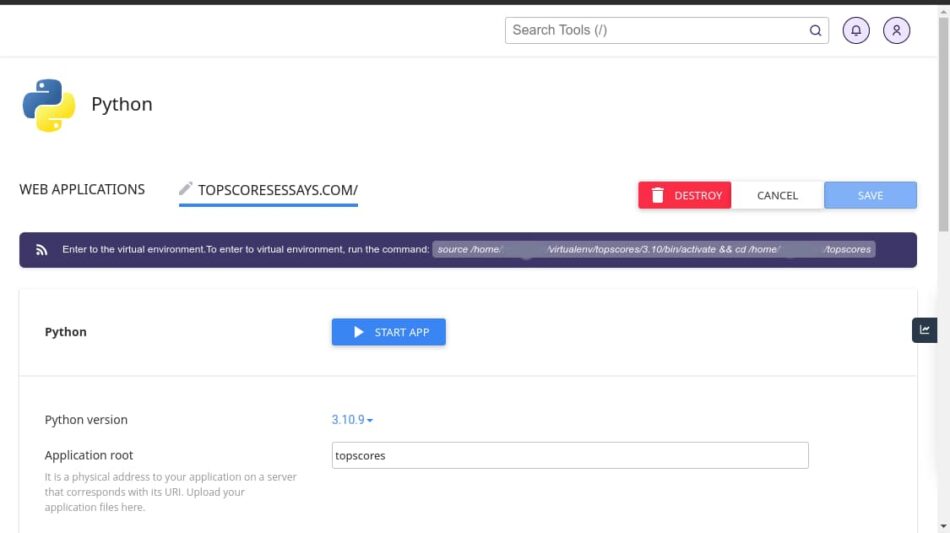
Step 4: Copy the command for entering to the virtual environment of your Python app
When you create a Python app in cPanel, it is recommended to create a virtual environment for the app. This is a separate and isolated Python environment that can have its own dependencies and configuration settings.
The good thing is that cPanel will create the virtual environment for you automatically.
To enter the virtual environment for your Python app, you need to run a specific command in the terminal. This command typically starts with “source” and includes the path to your app’s virtual environment.
Once you are inside the Python app configuration interface, you should see an alert pill instructing you to copy the command for the location of your app folder and virtual environment.
The alert looks like this:
Enter to the virtual environment. To enter to virtual environment, run the command:
source /home/username/virtualenv/app_name_folder/3.10/bin/activate && cd /home/username/app_name_folder
Copy the command to your clipboard by highlighting or pressing the copy button.
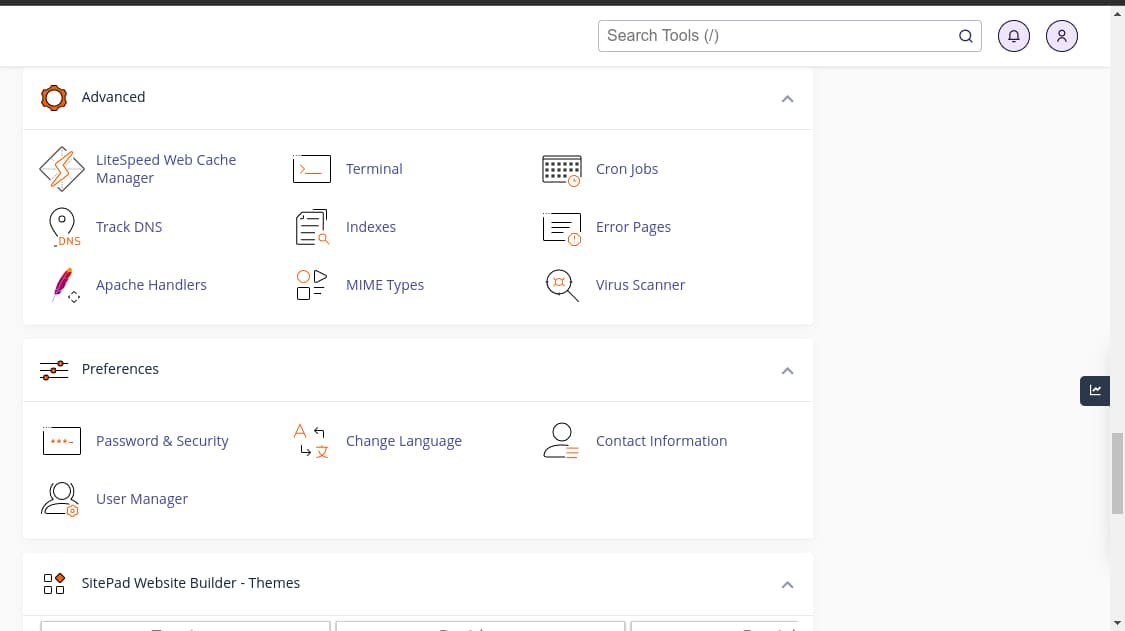
Step 5: Go back to the cPanel Dashboard and locate the Terminal App
Once you have copied the command for activating the virtual environment of your Python app, go back to the cPanel dashboard and locate the Terminal app.
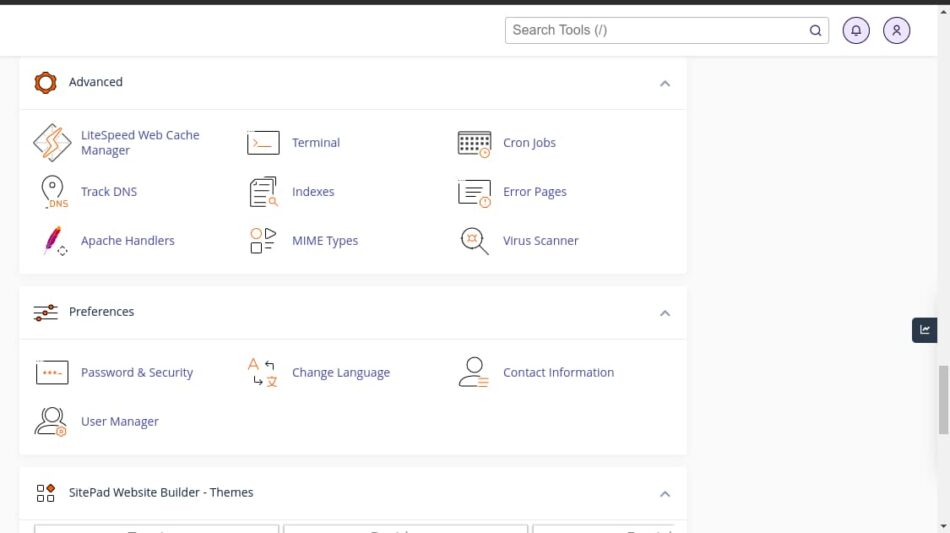
The Terminal app in cPanel allows you to access a command-line interface (CLI) directly within your hosting account.
This can be useful for running commands and scripts that may not be available through the cPanel GUI.
The location of the Terminal app may vary depending on the theme and layout of your cPanel account. However, it is typically located under the “Advanced” or “System” sections.
Once you locate the Terminal app, you can click on it to open the terminal window.
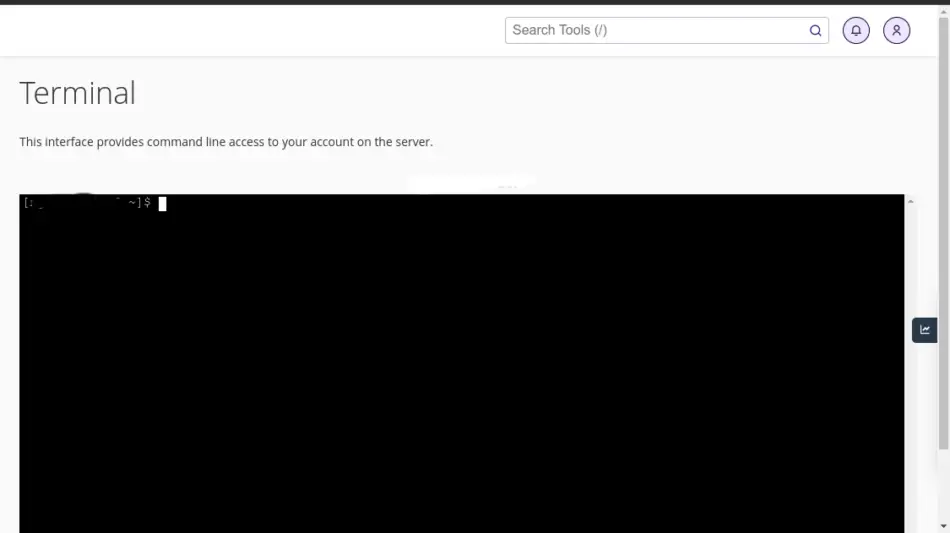
Step 6: Paste the command for activating the virtual environment of your Python app
After you have copied the command for entering the virtual environment in Step 4, you need to paste it into the terminal to activate the virtual environment.
To paste the command in the terminal, right-click or use the keyboard shortcut to paste the command.
Once the command is pasted, you can press Enter to activate the virtual environment.
After activating the virtual environment, you will see that the name of the environment is typically added to the beginning of the terminal prompt.
This indicates that you are now working within the virtual environment and any Python commands or packages that you install will be installed within this environment.
Step 7: Install Django and its dependencies using pip
With an activated Python virtual environment, installing Django and its dependencies is very easy.
To install Django in a virtual environment, you simply need to run the command “pip install django” in the terminal.
pip install djangoPip will automatically download and install the latest version of Django, along with any required dependencies.
You have the freedom to install other Python packages using the pip command. For example, a typical Django application needs the Pillow package to manage images.
You can install the Pillow Python package the same way.
pip install pillowBesides, if you have a requirements.txt file inside your Python app directory, you can install the required packages using the pip command. Here is the right command to use:
pip install -r requirements.txtStep 8: Confirm that Django has been installed
Once the installation is complete, you can verify that Django is installed by running the command.
"python -m django --versionThis should display the version number of Django that you just installed.
With that, you have successfully installed Django and its dependencies for your Python Django project hosted on Cpanel.
To learn more about hosting Django web applications on shared hosting such as configuring the Domain name of your web app, check out: How to deploy Django website on shared hosting
How to install other Python modules in cPanel
To install other Python modules for your Python app running on your Cpanel shared hosting account, you need to access the Terminal app and do the same thing we did when installing Django.
Here are the actionable steps you need to take to install Python modules in Cpanel:
- Log in to your cPanel account and navigate to the “Terminal” option under the “Advanced” section.
- Once you’re in the Terminal, you need to check if Python and pip are installed on your system. You can do this by running the following commands:
python --versionANDpip --version - Navigate into the Python app’s directory and activate the virtual environment using the command:
source myenv/bin/activate - Once the virtual environment is activated, install your preferred Python module and its dependencies using pip. Run the following command to install a module:
pip install your_module_name - After the installation is complete, verify that your Python module is installed by running the following command:
python -m your_module_name --version
That’s it. By following these steps, you should have successfully installed your preferred Python modules on cPanel using pip!
Fix no setup Python app in Cpanel
If you are unable to find the “Setup Python App” app in your cPanel dashboard, here are some actionable steps you can take to fix the issue:
- Check if your hosting provider supports Python apps in cPanel. Some hosting providers may not support Python apps in cPanel, so it’s worth checking with your provider first to ensure that the feature is available.
- Check if the “Setup Python App” app is installed on your cPanel account. In some cases, the app may not be installed by default and needs to be added manually. You can check for this by searching for “Setup Python App” in the search bar in cPanel.
- Contact your hosting provider’s support team. If you have tried the above steps and are still unable to find the “Setup Python App” app, it’s best to contact your hosting provider’s support team for assistance. They may be able to provide additional troubleshooting steps or enable the feature on your account if it’s not currently available.
If you wish to have a hosting provider that provides you with access to hosting Python apps, here is my recommendation:
Struggling to find affordable hosting for your Django web application?
This hosting service offers a cost-effective solution that is tailored for
Allowing you to:
🚀 Supercharge Your Ideas: Worried about investing too much upfront? Our affordable shared hosting lets you test and validate your innovative concepts created using Python Django without draining your budget.
🎯 Lure and Impress Clients With an Already Deployed Django Project: You just need one hosting plan to host unlimited Django websites.
⚙️ Hassle-Free Setup: With the user-friendly interface, you’ll have your Django project up and running in minutes with this Django-ready optimized host. Besides, I have written an article for you to use to deploy your Django app, here.
Act now while there is a huge discount on their hosting plans. Use the link below
Conclusion
Installing Django on cPanel using pip can seem daunting at first, but with the right steps and approach, it can be a straightforward process.
To summarize, here are the steps needed to install Django and other Python packages or modules in cPanel shared hosting:
- Ensure that your hosting provider supports Python apps in cPanel.
- Locate the “Setup Python App” app in your cPanel dashboard.
- Select the Python app you wish to install Django for.
- Copy the command for entering the virtual environment of your Python app.
- Open a Terminal within the cPanel dashboard and paste the command to enter the virtual environment.
- Install Django and its dependencies using pip.
- Install other required Python modules and packages for your Python app using the pip command.
- Verify that Django is installed by running the command “python -m django –version”.
- Configure your Django app and web server settings according to your needs by following this guide: How to configure your Django in cPanel.

