![]()
How to create and activate Django development environment in Ubuntu Linux
Before I start coding, I always ensure that I have the proper setup that will enable me to write good code without returning to do the initial setup for a Django project.
I am sure you would also like to do the same for all your Django projects.
Without wasting time, here are the practical initial steps to complete before you start writing code for your new Django project.
Configuring Django beforehand will save you time as you start coding.
The first thing you need to do even before you start setting up a development environment for Django is to install Python.
As you know, Django is a Python web framework used to create web applications in less time and code. Thus, you must set up Python on your Linux system before installing Django.
So. how do you install Python on Linux?
Open the Terminal and execute the following commands to install Python or update Python to the latest version:
sudo apt update && sudo apt upgrade

sudo apt install python3 python3-pip virtualenv
The commands above install the latest version of Python, pip3, and virtualenv.
Pip3 is a Python package manager that you will use to install Django and other packages from the PyPI repository.
We’ll use virtualenv to create a Python virtual environment.
Installing the latest version of Python should work fine with any Django project.
However, you may install a specific Python version to use on your Django projects.
If you’re going to use Django 2.0 and later, install Python version 3, not Python version 2.
So,
What Python version can I use with Django?
You can use Django with any version of Python3. You should not use Django with Python 2 because it may lead to compatibility issues with Django dependencies.
Besides, Python 2 is a deprecated version of Python. Installing new packages may be challenging as some will strictly run on Python version 3.
Use any version of Python 3 or, most probably, the latest version for your Django projects.
With that done, you should start setting up a Django development on Linux.
How to set up Django development environment
In summary, follow these steps to set up a development environment on Linux:
- Step 1: Create a virtual environment for installing Django
- Step 2: Create a directory to store all your Django code
- Step 3: Install Django using pip
- Step 4: Install code editing software or an IDE for writing and editing your Django code
- Step 5: Run the development server and start writing code for your next Django web application
When creating a Django project, you need to create a plan first.
And what is a better strategy than to set up Django within the initial steps?
This approach will ensure that you do not have to take additional time to come back and configure these things when you’re writing code for the business logic part of your web application.
You need to make sure you have a list of all the requirements and required packages for your Django project.
For example, a blog application should have Pillow, CKEditor, and Bootstrap CSS framework packages.
Identifying all the requirements and packages for your Django project make your Django project workflows execute smoothly.
Moreover, you will identify available packages and libraries you can integrate into your Django project.
You will not need to reinvent the wheel for functionality available and maintained in a library or package.
Besides, introducing bugs to a well-maintained library or package is not easy compared to writing functionality from scratch by yourself.
So, take time to identify all the required libraries, APIs, and packages that you will use for your Django project.
Make a list of them.
Next, start configuring the Django development environment based on your identified requirements.
The steps I will show you can be used on any Django web application, small or large.
Based on the business logic being solved, most Django websites will require you to set up these steps while developing your project.
How to create virtual environment on Linux
After you have installed Python, create a new virtual environment for installing Django, its dependencies, and required packages by following these steps:
Step 1: Open a new Terminal window
Locate the Terminal app in your apps list or press CTRL + ALT + T.
Step 2: Install required Linux packages such as Python, Python3-pip, and virtualenv
To install the latest Python, type the following command and press Enter:
sudo apt update && sudo apt install python3Install Python3-pip and virtualenv using the following command:
sudo apt install python3-pip virtualenvStep 3: Create a new virtual environment using venv command
python -m venv ~/.virtualenvs/NewDjangoProjectEnv
python -m venv command is used to create a new Python virtual environment on Linux.
Name your project any name that you may want.
The command above creates a virtual environment called NewDjangoProjectEnv inside the ~/.virtualenvs folder.
I use a separate directory to keep all the virtual environments used in my Django projects.
To create the directory, use mkdir ~/.virtualenvs command if you do not have such a directory.
This way, I don’t have to commit the directories when committing my code to a git repository.
Moreover, to keep the Django project directory clean and organized, I keep the virtual environment directory in a separate folder.
More information on how to set up Python and Python virtual environment is in this article.
After creating the virtual environment, you will have to activate it to install Django.
How to activate virtual environment in Ubuntu Linux
You need to use the source command to activate the Python virtual environment.
Open the Terminal and type the following:
source ~/.virtualenvs/NewDjangoProjectEnv/bin/activate
Here, we’re navigating into the directory where we created the virtual environment and activating it using the source command. Use the name of your virtual environment and the directory you specified when creating the virtual environment.
Activating the virtual environment is as easy as that.
After activating the virtual environment, install Django, its dependencies, and other packages required for our Django web application.
Install Django, its dependencies, and PyPi packages using pip
In an activated virtual environment, you can use pip to install Django and other packages.
Here’s how you install Django in a virtual environment:
1. Open the Terminal and activate the virtual environment.
Press CTRL + ALT + T at the same time or open the app from the apps list.
2. Install Django using pip install django command
pip install djangoYou may also specify a specific version of Django by using the double equal sign after the keyword ‘django’
pip install django==3.0Do I have to install Django for every project?
When creating a new Django project, installing Django on a new virtual environment is a good practice.
Creating separate and isolated virtual environments for every Django project allows you to use a specific Django version on each project. Moreover, updating Django on one project will not interfere with the versions installed on other projects.
Thus a good approach is to separate each project’s virtual environments and install Django on each one of them.
If you want to know more about installing Django using pip, follow this link with a detailed article.
Other packages commonly integrated with Django projects are Bootstrap CSS framework, Python Decouple, and Pillow.
This article contains more information about packages and libraries you should be using along with Django.
Here’s how to install Bootstrap, Python Decouple, and Pillow.
Open the Terminal and copy and paste the command for each required package.
Installing Bootstrap 5 using pip
pip install django-bootstrap5This article provides more information on how to integrate Django with Bootstrap 5 the right way.
How to install Pillow and Python Decouple
Installing Pillow using pip
pip install pillowPillow is an image processing library that you can use to manipulate and compress images used in your Django application.
Installing Python Decouple using pip
pip install python-decouplePython Decouple allows you to separate your Django code and code that contains sensitive information such as database or API connection parameters.
Moreover, Python Decouple helps you organize constantly changing parameters so that you can easily change them in one place.
Find more information about Python Decouple here.
After installing Django and other required packages, create a new directory for your Django project.
Create a directory to store all your Django code
Create a directory to store your project code and assets, such as images.
I prefer to keep all my Django projects inside the Desktop folder.
So, create a new directory in the Desktop directory or any other directory that you may want.
Open the Terminal and type the following to create a new directory inside the Desktop folder:
mkdir ~/Desktop/newDjangoProject
The command above creates a new directory, newDjangoProject, inside the Desktop folder.
You are free to create the directory anywhere on your file system—the same for the directory name for your Django project.
Navigate into the newly created folder, activate the virtual environment, and create a new Django project.
Navigate into a folder on Linux:
cd ~/Desktop/newDjangoProject
Activate the virtual environment:
source ~/.virtualenvs/NewDjangoProjectEnv
Start a new Django project.
Here’s how to create a new Django project.
Use the django-admin utility to create new Django projects.
Type the following in the Terminal to start a new Django project:
django-admin startproject myDjangoProject .
The command above creates a new Django project called myDjangoProject inside the current directory, which we’re navigated in.
To avoid creating two duplicate directories for our Django project, we use a dot (.) at the end to instruct django-admin to create the project folder inside the current directory we are in.
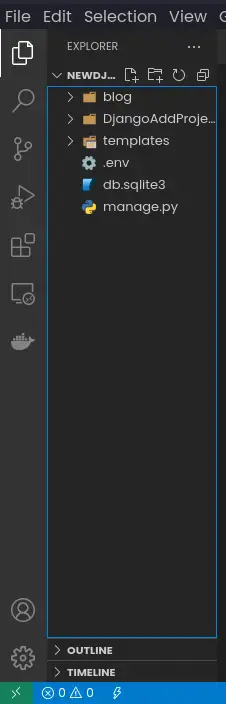
If you list the directory’s contents, you should see the manage.py file and the project directory.
That confirms that we have successfully created a new Django project.
Now that we’re done creating a new Django project, you will need code editing software or an IDE to edit your Django code.
How to install Pycharm and VS Code on Linux
Install code editing software or an IDE for writing and editing your Django code
I like to use Visual Studio Code to edit my Django code or Pycharm as an IDE.
Visual Studio Code is a code editing software you can use to write and edit your Python and Django code.
Moreover, Visual Studio Code makes it easy to create Django HTML templates, CSS, and Bootstrap code.
With autocomplete, writing code with Visual Studio Code has always been the go-to code editor for me as it makes the writing process easy.
How to install Visual Studio Code on Ubuntu Linux
Here’s how to install Visual Studio Code on your Linux machine:
Open the Terminal and execute the following commands sequentially:
sudo apt update

sudo apt install software-properties-common apt-transport-https

wget -qO- https://packages.microsoft.com/keys/microsoft.asc | gpg --dearmor > packages.microsoft.gpg

sudo install -o root -g root -m 644 packages.microsoft.gpg /etc/apt/trusted.gpg.d/

sudo sh -c 'echo "deb [arch=amd64 signed-by=/etc/apt/trusted.gpg.d/packages.microsoft.gpg] https://packages.microsoft.com/repos/vscode stable main" > /etc/apt/sources.list.d/vscode.list'
After updating the distro repo, install Visual Studio Code using the following commands:
sudo apt update

sudo apt install code
Alternatively, you can use a powerful IDE, PyCharm, to write and debug your Django websites.
How to install Pycharm on Linux
Pycharm offers excellent features such as autocompletion, debugging, and error detecting mechanisms for your Python and Django web applications.
Be sure to use Pycharm to increase your productivity.
Here’s how to install Pycharm on Linux operating systems such as Kali Linux and Ubuntu:
Head to the JetBrains download page and Download Pycharm Community Edition for Linux. It is free to use.
After downloading the compressed file, extract the contents to a folder.
Open the folder using the Terminal and type the following:
cd bin

,/pycharm.sh
Wait for Pycharm to start, and you can begin to use Pycharm to edit your Django code.
Store Django secret key and database parameters as environment variables
Keep your sensitive information, such as Django secret key, database connection, email passwords, API connection details, e.t.c, as environment variables.
This way, when you add the .env to the .gitignore file, you are sure you will not commit them to a public place.
Moreover, connection parameters may change, and you may be required to change these variables.
Keeping all your parameters likely to change in one .env file allows you to change them easily.
You are not required to browse through all your code to change specific connection parameters. You do that in one place.
Using environment variables will save you time.
If you recall, we installed the Python Decouple package earlier.
Python decouple is a Python library that helps you organize and separate configuration parameters for your Django project.
Open the project folder using your favorite IDE or code editor and open the settings.py file.
I will be using Visual Studio Code.
Initially, your configuration parameters are stored like this in your Django project:
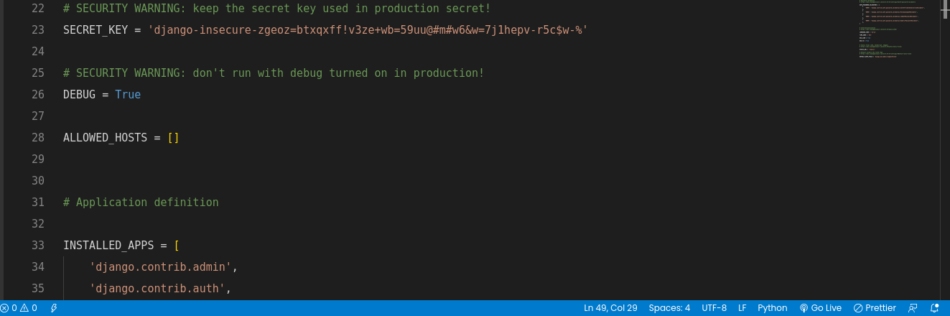
However, storing your secret key and other parameters inside your settings.py file code is not a good practice.
Always keep these parameters in environment variables.
To start using Python Decouple for storing your Django project parameters, import the Python Decouple and start using it across your configuration files.
At the top of your settings.py file, add the following line to import Python Decouple.
from decouple import config, CsvThen, whenever you want to hide parameters, use the config function and provide the parameter name as the argument.
Create a .env file that you will use to store your environment variables for local development. Use the same directory that has your manage.py file.
After creating the .env file, add it to the .gitignore file to avoid committing it to a remote repository.
Open the .gitignore file and add the following line:
.envWhen you commit your project files to a remote location, the .env file will never be committed. I know that you know how git version control works.
Now, create your environment variables the same way you create variables in Python. Variables are declared using this syntax: variable_name=value.
So, open the .env file and start adding your environment variables.
For example, if you want to store the Django SECRET_KEY variable as an environment variable, set the variable name to SECRET_KEY and the value in your .env file.
SECRET_KEY=786YUY$&*$&USYUHJSJOEIU(E*HOUR)HHJKSHKFHSKJFHLSKHFISFIYour .env file should look like this:

To use the SECRET_KEY parameter in your Django code, you just have to refer to the environment variable name instead of the value.
SECRET_KEY = config('SECRET_KEY')Add other parameters used by your Django application, such as database connection details, and use them in your Django code by using the config function of the Python Decouple package.
After deployment, you just have to enter these environment variables under the environment variables section of your web application.
Every web hosting that supports Python applications has the support for storing environment variables.
You do not need to upload the .env file.
By the way, check these hosting companies if you need to deploy your Django application.
I trust their services and have used them for a couple of years. They are very reliable.
The initial Django project setup is not complete until you have connected your application to a better database such as MySQL or PostgreSQL.
Set up the database for your Django project
Django supports many database management systems, with the most widely used being the basic lightweight database SQLite, PostgreSQL, MySQL, MariaDB, and Oracle.
Out of these options, I have always chosen PostgreSQL or MySQL for my Django projects.
The Django backend community and most hosting companies provide these database management systems as the primary databases.
Thus, you do not have to request the hosting companies for a new database system set up whenever you buy a hosting package.
Whether you’re using PostgreSQL, MySQL, or any other database, set it up at the early stages of your Django development setup.
But, before you start using a new database, you must install a database connector for the database that you’re using in your virtual environment.
Besides, install the database on your machine.
After installing the database, note the database connection parameters such as the database user, password, port, and database name.
You will use these values to connect your Django application.
Here’s how you connect PostgreSQL or MySQL to your Django project
How to connect MySQL database with Django
Before you connect MySQL to your Django application, you will need a package called mysqlclient.
So, you must install it using pip to use it in your Django application.
Open the Terminal, activate the virtual environment, and type pip install mysqlclient to install the mysqlclient connector.
source ~/.virtualenvs/NewDjangoProjectEnv/bin/activate

pip install mysqlclient
Hoping that you created the MySQL database and kept a record of the connection details, open the .env file and add these database connection details like this:
DATABASE_NAME='enter_name_of_the_database_here'
DATABASE_USER='database_user_here'
DATABASE_PASSWORD='your_database_password'
DB_PORT=3306 or the port for your database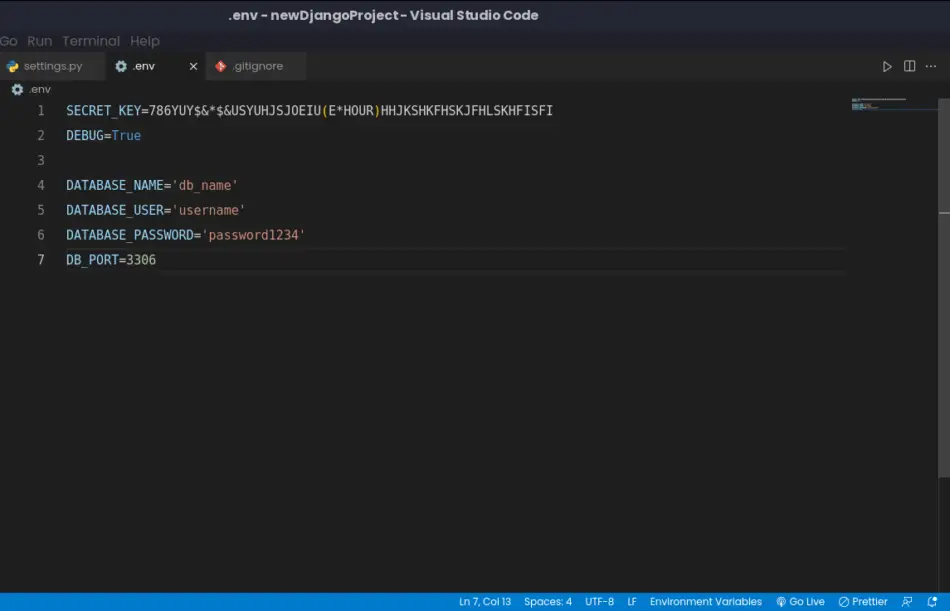
In your settings.py file, use these environment variables to connect your Django application to your MySQL database.
In the settings.py file, locate the DATABASES variable. It should look like this:
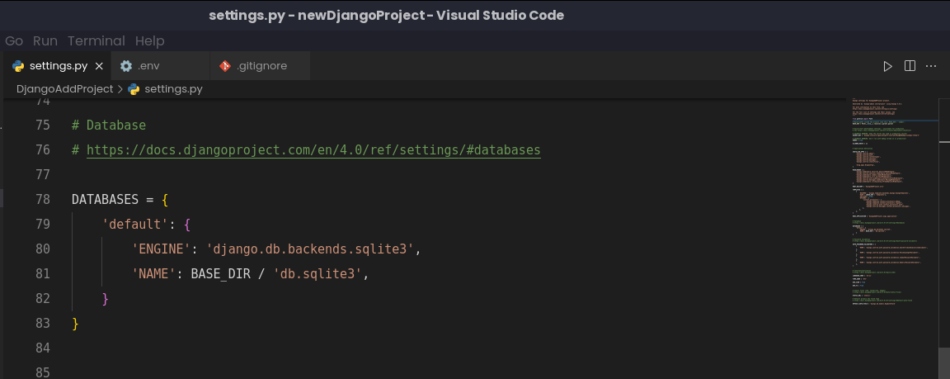
Replace the DATABASES variable with the following code:
DATABASES = {
   'default': {
        # new lines start here
       'ENGINE': 'django.db.backends.mysql',
       'NAME': 'DATABASE_NAME',
       'HOST': 'localhost',
       'USER': 'DATABASE_USER',
       'PASSWORD': 'DATABASE_PASSWORD',
       'PORT': 'DB_PORT'
   }
}
That is it. Your Django application is ready to use a MySQL database. Go ahead and test if the connection is working by running python manage.py migrate command.
How to connect PostgreSQL database with Django
If you want to use the PostgreSQL database for your Django application, you have the freedom to do so as Django supports the database.
However, you will need a database connector to be able to connect Django to your PostgreSQL database.
Ensure you have installed PostgreSQL on your system and noted the connection parameters such as database name, password, user, port, and host.
To connect Django and PostgreSQL, follow these steps:
Step 1: Activate the virtual environment and install the psycopg2 database connector.
source ~/.virtualenvs/NewDjangoProjectEnv/bin/activate

pip install psycopg2-binary
Open the .env file and add your database connection details like this:
DATABASE_NAME='enter_name_of_the_database_here'
DATABASE_USER='database_user_here'
DATABASE_PASSWORD='your_database_password'
DB_PORT=3306 or the port for your database
In your settings.py file, use these environment variables to connect your Django application to your MySQL database. Add the database connection details in the DATABASES variable of the settings.py file.
DATABASES = {
   'default': {
        # new lines start here
       'ENGINE': 'django.db.backends.mysql',
       'NAME': 'DATABASE_NAME',
       'HOST': 'localhost',
       'USER': 'DATABASE_USER',
       'PASSWORD': 'DATABASE_PASSWORD',
       'PORT': 'DB_PORT'
   }
}
With that, your Django application is ready to use the PostgreSQL database. Confirm the connection by running python manaage.py migrate command.
Run the development server and start writing code for your next Django web application
I know that you are familiar with the local server that comes with Django.
The runserver is a lightweight development web server that is used for local development.
The web server uses port 8000 and IP address 127.0.0.1 by default.
However, you can always specify the IP and PORT number for your Django web application.
Here’s how you run the development web server for Django on a local machine.
Activate the virtual environment that you have installed Django:
source ~/.virtualenvs/NewDjangoProjectEnv/bin/activate
Navigate into your Django project’s directory and execute the following command:
cd ~/Desktop/newDjangoProject
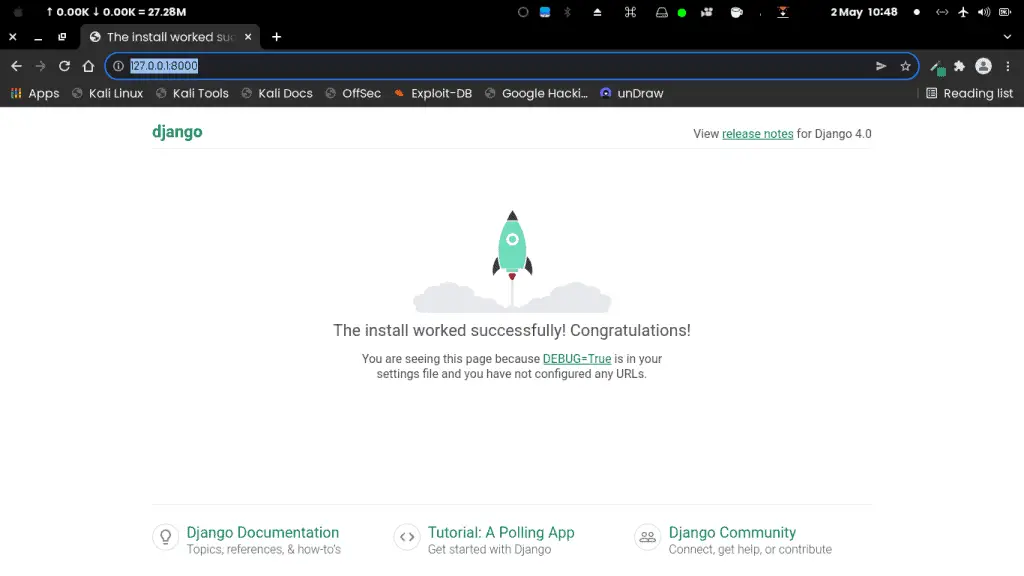
python manage.py runserverDjango will use the default IP and PORT to serve your Django application in a local development environment. Open 127.0.0.1:8000 on your browser.
Voila!
You should see a success message indicating your Django application is running.
That’s it for this tutorial.
I hope you have learned how to set up your Django project before you start writing code.
Moreover, you learned how to plan your project and avoid common pitfalls like overengineering your web application or reinventing the wheel.
Happy CTRL + C and CTRL + P!
Hmmm, probably you shouldn’t copy-paste before you understand the code.

