![]()
Fixing “No module named django” (A quick and easy guide)
Picture this: you’ve collected yourself, thrown away your blanket, and sat down ready to create the next big thing with Django. And BAM!, you try to run your Django development server or create a new Django project, and you get some “ModuleNotFoundError: No module named ‘django'” error. You feel like going back to that warm blanket and continue sleeping.
Oh, buoy! Don’t do that, I got you.
Fixing No Module named ‘django’ when working with Python projects is a straightforward process that won’t that much of your time. With the right knowledge and mindset, you can have your Python Django web development project up and running in no time.
What is “No module named ‘django'” ModuleNotFoundError in Python?
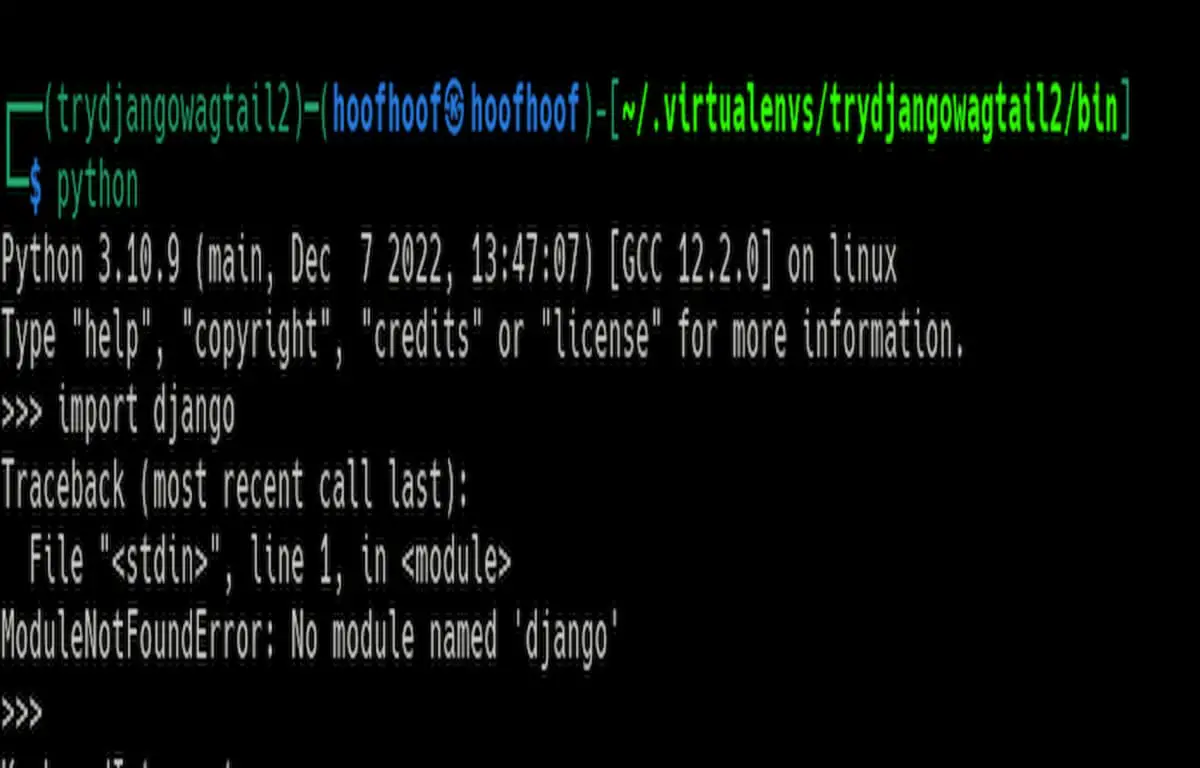
“No module named ‘django'” is an exception in Python, specifically a ModuleNotFoundError, which shows that the Python interpreter in your virtual or system-wide environment cannot find the installation location of Django. When Python cannot locate the specified Django module in the module search path, it will throw ModuleNotFoundError: No module named ‘django’.
The simple message indicates that Django has not been installed or its path has not been configured properly. Here are other reasons why you may get the exception in Python.
Reasons why “No module named ‘django'” error occurs
- Forgetting to install Django in your Python environment: If your active virtual environment does not have Django, definitely Python interpreter will throw a ModuleNotfoundError exception.
- Installing Django in the incorrect environment: Activating an incorrect Python virtual environment that does not have Django installed will result in No Module named ‘django’ error.
- Your IDE does not have an active or correct virtual environment with Django installed.
- Installing Django in an incorrect Python interpreter: When you have both Python 2 and Python 3 interpreters, you may be using pip to install Django while using Python 3 as the interpreter for your Django project.
How to fix “No module named ‘django'” error in Python
- Approach 1: Install Django
- Approach 2: Make sure Django is installed on a global environment
- Approach 3: Use pip3 to install Django if you are using Python 3
- Approach 4: Activate the correct virtual environment in your Terminal or IDE
Approach 1: Install Django
Having not installed Django is the main culprit to having the No module named ‘django’. Because one thing you should do is install Django. Here are the steps you need to take to install Django:
Step I: Open the Terminal
Step II: Run pip3 install django if you’re using a system-wide environment
If you’re using the system-wide environment for your Django project, you need to have Django installed. One simple way is to open a Terminal window and execute the following command;
pip install django

OR

pip3 install django
If you’re using a virtual environment to install Django, check steps III and IV.
Step III: Activate the correct virtual environment for your Django project
Most likely, you will be using an isolated Python virtual environment for your Django project. If you’re getting No module named ‘django’ error, you should check that you have an active virtual environment. You can run the following command to check if you have an active Python virtual environment:
echo $VIRTUAL_ENVAn active environment will print the path to the virtual environment directory.
Otherwise, activate the correct virtual environment you’re using for your Django project using the source env/bin/activate command.
source path_to_env/bin/activate

# e.g in your project folder

source my_env/bin/activate
Step IV: Install Django using pip install django command
After activating the correct virtual environment, install Django by running the following command:
pip3 install djangoIf you’re using Python 2 interpreter and you have both Python 2 and Python 3, use pip install django command:
pip install djangoStep V: Verify Django has been installed
Once the installation has been completed, type pip freeze or django-admin --version to check if Django has been installed successfully.
pip freezeThe command should list Django and its version if it has been installed.
OR
django-admin --versionRunning the command should display the currently installed Django version indicating that Django is installed in the currently active virtual environment.
Approach 2: Make sure Django is installed on a global environment
When you are working on a Django project and you do not want to create a virtual environment, you’re likely to face ModuleNotFoundError: No module named ‘django’. The cause for the error is that you do not have Django installed in your system-wide environment.
Choosing a system-wide Django installation for your Django project could be the reason why you’re having No module named django error because the system-level Python cannot find any Django package.
Installing Django in a global environment makes Django available to all your Django projects and will fix the ModuleNotFoundError: No module name ‘django’.
Here are the simple steps you need to take to install Django globally:
1. Open a new Terminal window
2. Type pip3 install django and press Enter
pip3 install django3. Verify installation by running django-admin --version
django-admin --versionA successful Django installation will show the version of Django installed on a system-level Python environment.
For detailed steps on how to install Django on a system-wide environment and why it is not recommended, check out this article I have written on that: Should I install Django globally?
Approach 3: Use pip3 to install Django if you are using Python 3
If you have both Python version 2 and version 3 in your system, you could be using Python 2 to install Django while in your project, you are using Python 3. If you use pip and you do not have any alias that points to pip3, you could be installing Django using the wrong Python interpreter.
For that, you need to install Django using pip3 instead of pip which points to Python 2 interpreter.
Python 3 uses a different version of pip, called pip3, which is designated to work with Python 3. If your Django project is using Python 3, make sure to use pip3 to install Django. Installing Django using pip3 in an environment using Python 3 as the default interpreter will fix the ModuleNotFoundError: No module named ‘django’ error.
Here are the steps to install Django using pip3:
Step 1: Open the Terminal
Step 2: Activate virtual environment for your Django project
source env_folder/bin/activateStep 3: Type pip3 install django and press Enter
pip3 install djangoStep 4: Verify Django installation by running pip freeze command
pip freezeThe pip freeze command should list Django and its version if it is installed in the current Python virtual environment.
You can also create an alias that points to pip3 so that whenever you are using the pip command, it uses pip3 to install Python packages. Here’s how to do that:
Open the Terminal and type
alias pip=pip3Press Enter and continue installing Django using the pip command:
pip install djangoApproach 4: Activate the correct virtual environment in your Terminal, VS code, or Pycharm
If you have Django installed in a virtual environment, it’s crucial to ensure that the virtual environment is active in your terminal and the IDE you’re using. Failing to activate the virtual environment will result in ModulenNotFoundError: No module named ‘django’
If you have a system-wide Django installation, you should not get No module named ‘django’ error.
How to activate virtual environment in Terminal
Follow these steps to activate Python virtual environment for your Django project using the Terminal:
Step 1: Open the Terminal window
Step 2: Change into the virtual environment directory using cd command
Using the cd command, navigate to the directory that has your virtual environment files. This can be inside your project directory or any directory that you have designated for strong all your virtual environments.
cd path_to_env

# if the env is inside your project directory, use

cd path_to_project_directory/env_folder
Step 3: Activate the virtual environment using source command
Once inside the directory with your Python virtual environment, run source bin/activate command to activate the virtual environment.
source bin/activateStep 4: Verify that the active virtual environment has Django
Once you have successfully activated the virtual environment, check that Django is installed by running django-admin --version command.
django-admin --versionOtherwise, install Django using the pip install django command.
pip install djangoHow to activate virtual environment in vs code
To activate a virtual environment in Visual Studio Code, you can follow these steps:
1. Open the Terminal in Visual Studio Code by selecting View > Terminal from the main menu OR CTRL + `
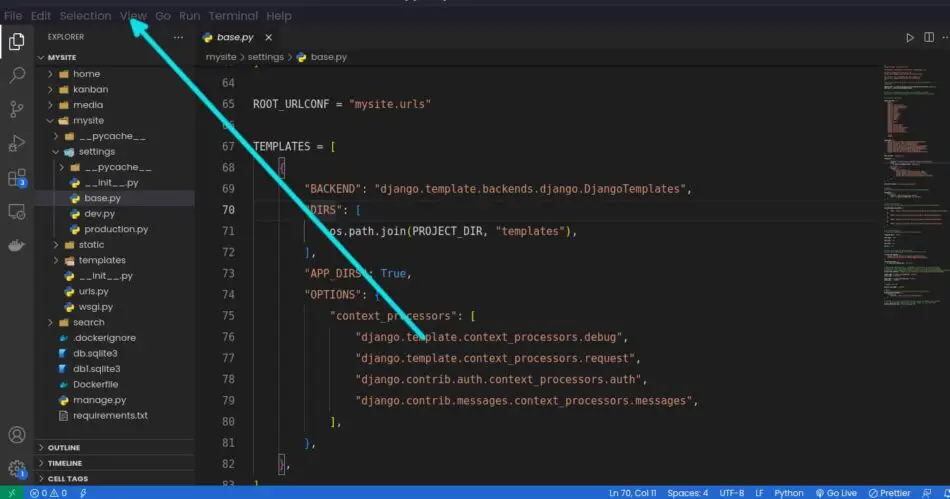
You should see a Terminal window at the bottom of your vs code window like the one should below.

2. Change the directory to your virtual environment using the cd command
Once you have the terminal window open, use the cd command to navigate to the location of the Python virtual environment you created for your Django project.
cd path_to_env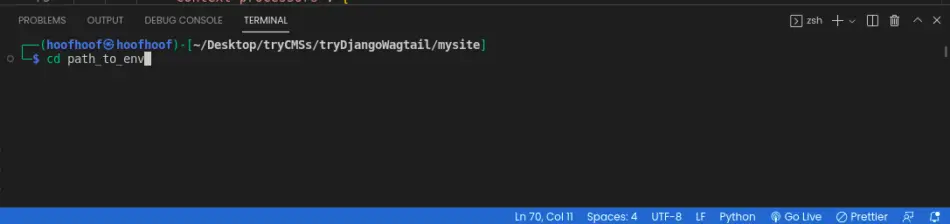
3. Activate the virtual environment by typing source bin/activate
After navigating into the virtual environment directory, use the source bin/activate command to activate the virtual environment.
source bin/activate
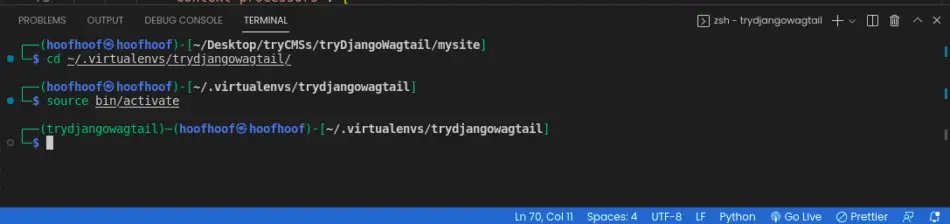
You should see the name of your virtual environment in the terminal prompt indicating that the virtual environment is active.
How to activate virtual environment in Pycharm
To activate a virtual environment in Pycharm, follow these steps:
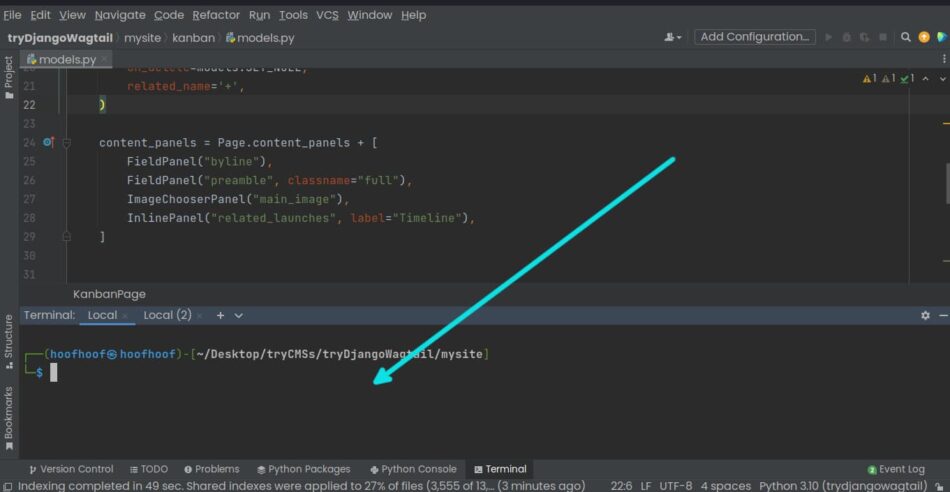
1. Open the terminal in PyCharm by selecting View > Tool Windows > Terminal from the main menu or press ALT + F12.
You should see a Terminal window at the bottom of your Pycharm window like the one should below.
2. Change the directory to your virtual environment using the cd command
Once you have the terminal window open, use the cd command to navigate to the location of the Python virtual environment you created for your Django project.
cd path_to_env
3. Activate the virtual environment by typing source bin/activate
After navigating into the virtual environment directory, use the source bin/activate command to activate the virtual environment.
source bin/activate
You should see the name of your virtual environment in the Terminal prompt indicating that the virtual environment is active.
In Pycharm, you can also use the GUI method to select the preferred Python interpreter in a virtual environment. To do that, follow these steps:
Step 1: In Pycharm, go to File > Settings > Project: <project_name> > Project Interpreter.
Step 2: Select the virtual environment that you’re using for your Django project
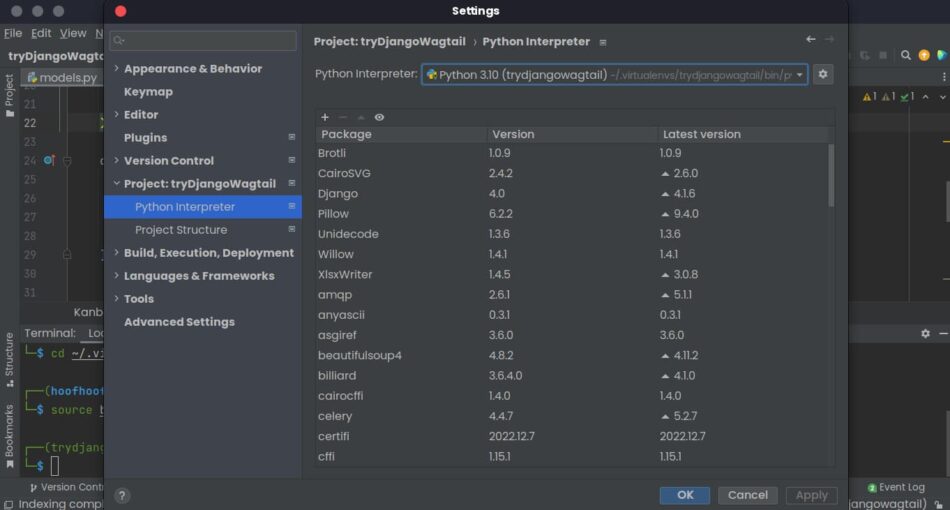
Step 3: Press Apply then OK to save the changes
How to verify that the No module named ‘django’ error has been fixed?
Verify using pip freeze command
If you run pip freeze command in your Terminal and you see Django and its version listed, you should be sure that “No module named ‘django'” has been fixed.
pip freezeVerify by creating a new Django project
Another sure way to verify if the ModuleNotFoundError has been fixed is to create a new project with Django. If the django-admin startproject project_name command executes successfully, then the ModuleNotFoundError must be fixed.
Steps to create a new Django project
- Navigate into the directory where you want to create the project using the
cdcommand. - Create a new Django project using the command
django-admin startproject project_name. Replace project_name with the desired name for your project. - Navigate into the project directory using the
cd project_directorycommand. Replaceproject_directorywith the name of your project. - Run the development server by executing
python manage.py runservercommand.
If the commands above executes successfully, you are assured that your ModuleNotFoundError: No module named ‘django’ is resolved.
Troubleshooting No module named ‘django’ in the future
Checklist to ensure “ModuleNotFoundError: No module named ‘django'” does not occur again in the future.
- Check that you have installed Django in your active virtual environment or global Python environment.
- If you have both Python 2 and Python 3 installed on your system, make sure you are using pip3 to install Django.
- Make sure the IDE you’re using to write Django code uses the correct Python environment. Besides, you can restart the IDE to fix the ModuleNotFoundError.
- Reinstall Django if the error still persists by activating the virtual environment and running
pip3 install django. - Uninstall Django by running the command
pip3 uninstall djangoand then install the Django by executing:pip3 install django. - Restart the Django development server if it is still running.
Recap
The “No Module named ‘django'” error can be resolved in several ways, including installing Django in a virtual environment, making sure that Django is installed in a virtual or global environment, using pip3 to install Django if you are using Python 3, and activating the correct virtual environment. Activating virtual environments in VS Code and PyCharm can be done using the terminal and the appropriate command line interface.
Creating a new Django project successfully, locating Django and its version in a pip freeze command, and checking Django version installed in your Python environment assures you that the error has been fixed.

