![]()
How to make Django forms look good with Django crispy forms
Every Django website should have nice-looking forms, especially when using forms to interact and receive input from your site users.
There are two approaches that you can take to style your Django website pages and forms:
- Using CSS and JavaScript or
- CSS framework and a form rendering package such as Django Crispy Forms.
Should I use Bootstrap or CSS in my Django website?
You should use a CSS framework such as Bootstrap to style Django web pages. The advantage comes in developing your web application faster. Moreover, you do not have to write too much CSS.
However, that does not mean you shouldn’t use CSS in your Django website.
Use CSS where it is necessary.
CSS and Bootstrap are a great combination for styling your Django web pages.
Back to the guide.
Styling web page components such as forms can be challenging because you must write CSS styles and rules to make them responsive.
Writing customer CSS and JS styling and rules can take a lot of time.
The best choice is to use an approach that encourages rapid development, using a CSS framework such as Bootstrap and a package designed to format your forms, such as Django Crispy Forms.
You will save a lot of time that you would have used writing CSS rules for your forms.
More time saved.
More time spent developing the primary objective of your Django application help solve a business case faster and achieve a fully functional website.
So, let’s start by understanding what Django Crispy Forms do.
What is Django Crispy Forms?
Django Crispy Forms is a Python package used to style Django forms to look more attractive and appealing than the default forms.
Django Crispy Forms relies on the CSS framework used in your Django project to provide rendering behavior for your forms.
These CSS frameworks supported by Django Crispy Forms are Bootstrap, foundation, Tailwind, Bulma, and uni-form.
In this how-to guide, I will focus on using Django crispy forms with Bootstrap 4.
I am going to show you in detail how to
Install Django Crispy Forms,
Configure your Django project to use Bootstrap 4 for crispy forms, and
Use crispy forms tags in your Django templates.
So, we will integrate our Django project with Bootstrap 4, install Django Crispy Forms, and start using crispy forms tags.
How to integrate Bootstrap 4 with Django
Integrating Bootstrap 4 with your Django project is easy because all you have to do is add the Bootstrap CDN links to your main template.
Using the main template that all your Django templates inherit from is a recommended practice, especially when you want to achieve universal styling or formatting.
An example of universal styling is when you want to have a uniform navigation bar or colour combination across every page on your Django website.
So, let’s install Python, create a new Django project, and add the main template file that we will name base.html
Install Python 3
Run the following commands to install Python version 3 on your system
sudo apt update && sudo apt upgradesudo apt install python3 python3-pipAfter the process completes, create a new virtual environment that you will use for your Django project.
I prefer to keep all my virtual environments in a single directory inside the home directory.
Copy the command below and run it on your Terminal.
mkdir ~/.virtualenvsThe command creates a new folder inside your home directory. Give it any name you want.
I will use virtualenvs as the folder name.
I use a dot before the folder name to hide the directory.
Therefore, the directory will not be visible from a standard file manager.
Inside the environments folder, create a new environment for your Django project.
python -m venv ~/.virtualenvs/projectEnv
After creating a new environment, create a new directory on the Desktop folder or anywhere.
You will use the folder to keep your Django project files.
Navigate into the folder using the Terminal, activate the environment, and install Django.
cd ~/Desktop/django_project_folder
source ~/.virtualenvs/projectEnv/bin/activate
pip install django
Create a new Django project
To create a new project, use the following command:
django-admin startproject portfolio .
After creating a new Django project, create a templates folder inside the project’s root folder – directory with the manage.py file.
mkdir templates
Inside the templates folder, create a new file and name it base.html.
The base template will hold the Bootstrap 4 files and other styling and formatting settings for the whole project.
Open the base.html file using your favorite IDE or code editor.
I am using Visual Studio Code.
Paste the following code that contains HTML boilerplate code.
<!DOCTYPE html>
<html lang="en">
<head>
   <meta charset="UTF-8">
   <meta http-equiv="X-UA-Compatible" content="IE=edge">
   <meta name="viewport" content="width=device-width, initial-scale=1.0">
   <title>Portfolio project</title>
</head>
<body>

</body>
</html>
Using the same boilerplate code, load your Bootstrap CSS using the link tag and JS at the bottom.
Here’s how to do it
<!DOCTYPE html>
<html lang="en">
<head>
   <meta charset="UTF-8">
   <meta http-equiv="X-UA-Compatible" content="IE=edge">
   <meta name="viewport" content="width=device-width, initial-scale=1.0">

   <!-- this line add Bootstrap CSS -->
   <link rel="stylesheet" href="https://cdn.jsdelivr.net/npm/[email protected]/dist/css/bootstrap.min.css" integrity="sha384-MCw98/SFnGE8fJT3GXwEOngsV7Zt27NXFoaoApmYm81iuXoPkFOJwJ8ERdknLPMO" crossorigin="anonymous">
   <title>Portfolio project</title>
</head>
<body>


   <!-- these lines adds Bootstrap JS files to our Django project -->
   <script src="https://code.jquery.com/jquery-3.3.1.slim.min.js" integrity="sha384-q8i/X+965DzO0rT7abK41JStQIAqVgRVzpbzo5smXKp4YfRvH+8abtTE1Pi6jizo" crossorigin="anonymous"></script>
   <script src="https://cdn.jsdelivr.net/npm/[email protected]/dist/umd/popper.min.js" integrity="sha384-ZMP7rVo3mIykV+2+9J3UJ46jBk0WLaUAdn689aCwoqbBJiSnjAK/l8WvCWPIPm49" crossorigin="anonymous"></script>
   <script src="https://cdn.jsdelivr.net/npm/[email protected]/dist/js/bootstrap.min.js" integrity="sha384-ChfqqxuZUCnJSK3+MXmPNIyE6ZbWh2IMqE241rYiqJxyMiZ6OW/JmZQ5stwEULTy" crossorigin="anonymous"></script>
</body>
</html>
Create the Django blocks that you will use across your website.
I prefer the title block for changing how each web page appears at the address bar and the content block where all HTML code for each web page will be.
<!DOCTYPE html>
<html lang="en">
<head>
   <meta charset="UTF-8">
   <meta http-equiv="X-UA-Compatible" content="IE=edge">
   <meta name="viewport" content="width=device-width, initial-scale=1.0">

   <!-- this line add Bootstrap CSS -->
   <link rel="stylesheet" href="https://cdn.jsdelivr.net/npm/[email protected]/dist/css/bootstrap.min.css" integrity="sha384-MCw98/SFnGE8fJT3GXwEOngsV7Zt27NXFoaoApmYm81iuXoPkFOJwJ8ERdknLPMO" crossorigin="anonymous">
   <title>
       {% block title %}
       {% endblock title %}
   </title>
</head>
<body>
   {% block content %}
   {% endblock content %}

   <!-- these lines adds Bootstrap JS files to our Django project -->
   <script src="https://code.jquery.com/jquery-3.3.1.slim.min.js" integrity="sha384-q8i/X+965DzO0rT7abK41JStQIAqVgRVzpbzo5smXKp4YfRvH+8abtTE1Pi6jizo" crossorigin="anonymous"></script>
   <script src="https://cdn.jsdelivr.net/npm/[email protected]/dist/umd/popper.min.js" integrity="sha384-ZMP7rVo3mIykV+2+9J3UJ46jBk0WLaUAdn689aCwoqbBJiSnjAK/l8WvCWPIPm49" crossorigin="anonymous"></script>
   <script src="https://cdn.jsdelivr.net/npm/[email protected]/dist/js/bootstrap.min.js" integrity="sha384-ChfqqxuZUCnJSK3+MXmPNIyE6ZbWh2IMqE241rYiqJxyMiZ6OW/JmZQ5stwEULTy" crossorigin="anonymous"></script>
</body>
</html>
After adding the blocks, we need to instruct Django to include the new templates folder so that we can use the base.html template across our site.
Open the project’s settings file inside the project configuration folder – we named it portfolio.
Inside the settings file, find the block of code that looks like this:
TEMPLATES = [
   {
       'BACKEND': 'django.template.backends.django.DjangoTemplates',
       'DIRS': [],
       'APP_DIRS': True,
       'OPTIONS': {
           'context_processors': [
               'django.template.context_processors.debug',
               'django.template.context_processors.request',
               'django.contrib.auth.context_processors.auth',
               'django.contrib.messages.context_processors.messages',
           ],
       },
   },
]
Replace the whole block of code with the following block:
TEMPLATES = [
   {
       'BACKEND': 'django.template.backends.django.DjangoTemplates',
       'DIRS': [BASE_DIR / 'templates'],
       'APP_DIRS': True,
       'OPTIONS': {
           'context_processors': [
               'django.template.context_processors.debug',
               'django.template.context_processors.request',
               'django.contrib.auth.context_processors.auth',
               'django.contrib.messages.context_processors.messages',
           ],
       },
   },
]
The line, 'DIRS': [BASE_DIR / 'templates'], instructs Django to use the templates folder that we created.
Thus, we can use the base.html code and Bootstrap across our Django website to render and style the pages.
Any HTML page that has {% extends ‘base.html’ %} line at the top will use Bootstrap and any other styling rule as the base theme.
Moreover, we can use Bootstrap CSS classes inside the content block.
How to use Bootstrap 4 in your Django templates
Whenever you want to use Bootstrap on new Django templates, you just need to extend the templates from base.html.
Every time you create new HTML templates, start with the following lines of code:
{% extends 'base.html' %}


{% block content %}
    <div class="container">
        <div class="row">
            ... add your HTML code here
        </div>
    </div>

{% endblock content %}
You may use Bootstrap classes on your Django HTML code, and it will work for your Django templates.
How to create beautiful forms with Django Crispy Forms
Now that we have configured our Django project to use Django, we need to install Django Crispy Forms.
Here’s how to install Django Crispy Forms in your Django project:
Open the Terminal, activate the virtual environment, and type
pip install django-crispy-forms
Hit Enter
Once the installation is complete, open the settings.py file and add the crispy_forms app to your INSTALLED_APPS.
INSTALLED_APPS = [
   'django.contrib.admin',
   'django.contrib.auth',
   'django.contrib.contenttypes',
   'django.contrib.sessions',
   'django.contrib.messages',
   'django.contrib.staticfiles',

   'crispy_forms',
]
Since we are using Bootstrap 4 as the template pack for our Django project, scroll to the bottom of your settings.py file and add the following line:
CRISPY_TEMPLATE_PACK = ‘bootstrap4’
Django is now set to use Django Crispy Forms and Bootstrap 4 as the main theme for your Django forms.
For demonstration, let’s create a simple Django application that allows users to send information using a contact form for our Django application.
Create a new contact app by opening the Terminal and typing the following:
python manage.py startapp contact
Add the contact app to your installed apps
INSTALLED_APPS = [
   'django.contrib.admin',
   'django.contrib.auth',
   'django.contrib.contenttypes',
   'django.contrib.sessions',
   'django.contrib.messages',
   'django.contrib.staticfiles',

   'contact',
   'crispy_forms',
]
Create the model forms for the contact app.
Open the models.py files inside the contact folder and add the following lines of code:
from django.db import models

# Create your models here.
class Contact(models.Model):
    name = models.CharField(max_length=255)
    email = models.EmailField()
    message = models.TextField()

    def __str__(self):
        return f"{self.name}'s message"
Here, we are using the name, email, and message fields as the attributes of the Contact table.
Django makes it easy to create tables, attributes, and relationships using the model.Model class.
The model will allow us to use the database to create persistent contact information.
Open the Terminal and run the following:
python manage.py makemigrations

python manage.py migrate
Find more information on how Django models work in this article.
Instead of creating new forms, we can use model forms to render the attributes we defined in the database in our contact form.
A model form provides an interface you can use to create an HTML form from an existing database model with a few lines of code.
Let’s define a model form for our Contact model.
Inside the contact folder, create a new file and name it forms.py.
touch contact/forms.py
Open forms.py and add the following lines of code:
from django.forms import ModelForm
from .models import Contact

class ContactForm(ModelForm):

    class Meta:
        model = Contact
        fields = '__all__'
The ContactForm instance will create an HTML form that we will use to collect data and save it to our contact table in the database.
The subclass ModelForm defines the specific form fields and corresponding HTML form widgets used across the form.
The Python class Meta defines the connection to which model to connect to and the fields that we want on our form.
In this case, we use all the fields in the database table.
Now, the form is complete, and we need to render the HTML form code to our template.
Set up the views of the contact app to render the generated form HTML.
Open the views.py file that is inside the contact folder and add the following lines:
from django.shortcuts import render
from .forms import ContactForm


# Create your views here.
def contact_view(request):
    form = ContactForm()
    context = {'form': form}
    template_name = 'contact.html'
    return render(request, template_name, context)
Here, we’re importing the generated form HTML, adding it to the context dictionary, and defining the template that the view will use to display the dynamic data on the front end of our web application.
Create a new folder inside the contact app and name it templates.
Inside the templates folder, create a new file and name it contact.html.
mkdir contact/templates && touch contact/templates/contact.html
Open the contact.html file and add the following code:
<form action="" method="post">
    {% csrf_token %}
    {{ form }}
    <input type="submit" value="Submit">
</form>
Open the main urls.py file that is inside the project folder. Add the following line at the top.
from contact.views import contact_view
Then, under the admin endpoint, add the following line of code:
path('contact/', contact_view)
The code above imports the contact form view we will render when one visits the /contact page of our website.
If we open the /contact URL, 127.0.0.1:8000/contact/, you can see the name, email, and message attribute rendered on our HTML template.
However, our form doesn’t look nice.
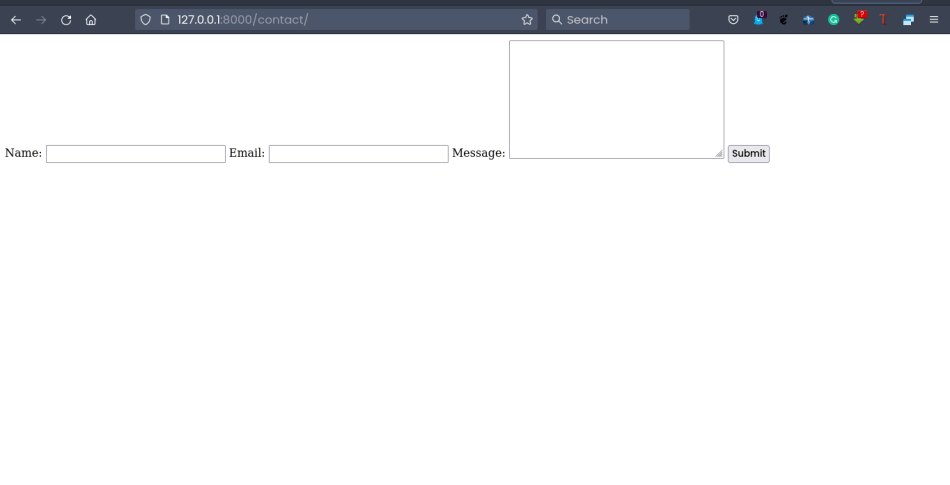
Let’s try to style it up using Django Crispy Forms – make it crispy!
How to use crispy forms tags and filters in Django forms
To use crispy forms tags, you have to add {% load crispy_forms_tags %} at the top of every Django template you want to render your forms. To use the crispy filter, add |crispy after the name of your form or formset.
Here’s how to use crispy forms tags and filters
Open the contact.html template inside the contact/templates folder and replace the whole file with the following lines of code:
{% extends 'base.html' %}
{% load crispy_forms_tags %}

{% block content %}
   <div class="container">
       <div class="row my-5">
           <div class="col-md-12">
               <form action="/contact/" method="post" class="form">
                   {% csrf_token %}
                   {{ form|crispy }}
                   <button type="submit" class="btn btn-primary">Submit</button>
               </form>
           </div>
       </div>
   </div>
{% endblock %}
First, we add {% load crispy_forms_tags %} to our contact template.
We append |crispy filter to our form variable, form to have {{ form|crispy }}
If I refresh the page, I should see a very nice contact form for our Django web application.
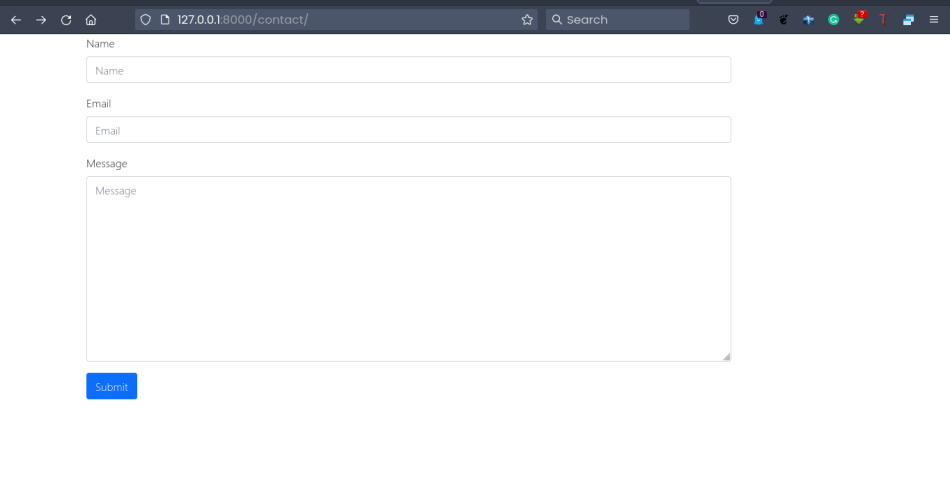
Notice the Bootstrap 4 classes also work with our Django application.
Setting up Django Crispy Forms and Bootstrap 4 is as easy as that.
And that’s it for this tutorial, and I hope to see you next time.

