![]()
How to install Django in Kali Linux
Installing Django on your Kali Linux machine involves several steps; choosing where to install it, how to configure an environment, and installing other dependencies.
Here’s how to install Django on Kali Linux.
Step 1: Update your system and install Python 3 and pip package manager.
Open the Terminal by pressing CTRL + ALT + T or searching the Terminal app in your apps list and type the following commands.
sudo apt updatesudo apt install python3 python3-pipStep 2: Install a virtualenv library that you will use to create new virtual environments.
sudo apt install virtualenvCreate an isolated directory to store all your environment variables in one place. I prefer to make the directory in my home directory and call the directory .virtualenvs. You are free to name it anything.
mkdir ~/.virtualenvsAfter installing the virtualenv package, use the venv command to create a virtual environment which you will use to install Django.
python3 -m venv ~/.virtualenvs/my-env Activate the virtual environment.
source ~/.virtualenvs/my-env/bin/activateStep 3: Install Django in your active virtual environment.
pip install djangoStep 4: Test your installation by creating a new Django project and running the runserver command.
django-admin startproject my_project .python manage.py runserverI have been a very loyal friend when using Kali Linux.
I mean, it has always been the go-to Linux distribution.
Not that I do not have many other choices, but I like the geeky feeling, although I do not know much about hacking and stuff.
I like testing the waters and taking up the challenge.
And sometimes, the challenge comes when you have that Terminal open and do not know what’s next.
You start having the thoughts, is computer science really my career? “Maybe, I should become a medicine man.” Wait, medicine man? Aren’t they called doctors?
Well, I also experience those dreaded moments where you must rethink your career and start thinking of simplistic ways out.
But, it all comes down to one thing, choice. It is either you tackle the problem or choose the easy way, which in the end probably will be hard.
Therefore, let’s tackle the problem at hand.
You have read great comments on Django’s best choice for web development. I mean, it is developed for perfectionists.
And you being one of them, want to nail that first project.
But you have no idea how to use it, despite you being one of me that likes to feel geeky when using a Linux Terminal – I mean, enjoying the Neo-like feeling – Matrix movie.
Or maybe someone recommended it to you, and you want to install Django and test it out.
If that is the case, check out this article that details the uses of Python Django web framework.
Also, Django for Beginners should be the book to start with if you want to learn basic to advanced Django web development.
Whatever your reason, I got you.
In this article, I will take you through a step-by-step guide showing you how to install Django on Kali Linux.
You will learn:-
1. What you need to install on your Kali Linux before you install Django
2. How to install Django on a global/system environment
3. How to configure and install Django on a virtual environment
4. And finally, setting up your first Django project
What you need to install on your Kali Linux before you install Django
Before you install Django on your system, ensure that you have installed the latest Python and pip version.
To confirm if you have Python installed.
Open the Terminal
Then, copy and paste the following command:
python3 -VThe current Python version will be printed out on the Terminal

Otherwise, if Python3 is not installed on your system, you will get an error indicating that
Command ‘python3’ not found.If Python3 is not installed on your Kali Linux, you can install it easily using the following command.
First, run,
sudo apt updateThen run
sudo apt install python3 python3-pipIf you want a specific Python version, indicate it in your command by typing:
sudo apt install python3.10Whatever version you want to install, indicate it at the end of the keyword ‘python’.
Type Y and press Enter to continue. The apt package manager will download and install the latest python for you.
Confirm that Python and pip installation through
python3 -vpip3 -vWhy python is needed when installing Django
Python and Django are intertwined together.
Therefore, Django cannot run without Python.
The reason is that Django is a Web framework written using python.
Although you do not need to be an expert in using the Python programming language, you need to know the basic concepts such as functions and classes.
These concepts are required because you will need them when creating web application functionality, such as models that define the database schema.
Suppose you want to advance your Python programming knowledge to understand advanced concepts such as object-oriented programming. In that case, Fluent Python: Clear, Concise, and Effective Programming book should be the book to get your hands on.
The book has helped a lot in understanding Python programming concepts such as objects, classes, functions as objects, control flow, and data structures.
How to install Django on a system-wide environment
After installing Python3, you can install Django in the system-wide environment.
A system-wide environment allows you to set up a Django project anywhere on your Linux filesystem.
Django installation happens the same way it would when installing a software program such as a VLC media player.
Run the following command on your Terminal
pip3 install DjangoAfter installing, you can use the Django-admin command to check the version.
Django-admin command acts as a command-line utility that can be used for administrative activities such as creating new Django projects, apps, and users.
To check the Django version, type the following on your Terminal
django-admin --versionYou are now ready to use Django to build your web applications.
However, you may have questions like, “What if I want to have multiple projects with different Django versions on the same Linux?”
The answer to this is to install Django in isolated environments.
Installing Django system-wide has its disadvantages
First, you cannot have multiple projects using different Django versions.
When you update Django, all other projects in the system will end up using the updated version.
Second, Django dependencies may end up breaking the system. Installing different versions that are different from your Debian distribution version can break file permissions or result in conflicts between pip and the apt package manager.
Thus, a better approach would be to install Django in a virtual environment.
How to install Django on a virtual environment
A virtual environment provides a separate space specific to your Django project.
Therefore, the packages installed on each project do not depend on the OS-wide python packages.
Virtual environments help develop isolated environments that have different dependencies.
Installing Django in a virtual environment offers better management for all the projects installed on your system.
You can install Django versions that are independently separate from each other.
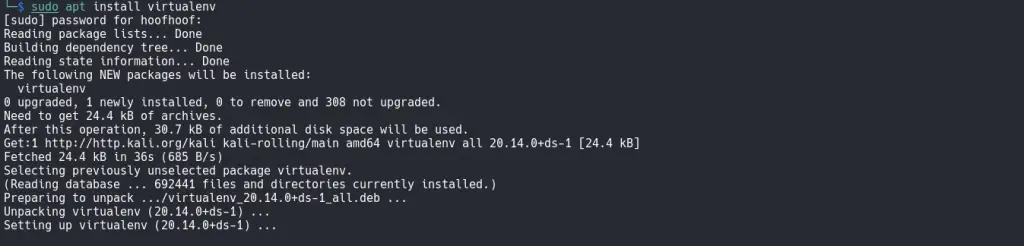
To install Django on a virtual environment, you need to install virtualenv on your system. Follow the following steps to install virtualenv.
Type the command
sudo apt install virtualenv and press Enter
After installing virtualenv, you can now create a virtual environment using the venv command.
But first, keeping your virtual environments in a single location on your OS user-specific folder is a good practice. To do that, type:
mkdir ~/.virtualenvs The command will create a folder on your / (root) directory called .virtualenvs. You can name the directory anything you want. This directory will keep all your virtual environments specific to each project.
Installing virtual environments in a separate folder from the project files helps avoid committing virtual environment-specific files to a remote location.
These files can grow in size, leading to a longer upload time when pushing your code to the GitHub repository or any other remote location.
After creating the directory, type the command:
python3 -m venv ~/.virtualenvs/my-env The command will create a new virtual environment called my-env. Also, you can specify any name that you want.
After creating the environment, you need to activate it so that you can be able to install Django and its dependencies.
Type
source ~/.virtualenvs/my-env/bin/activateAfter pressing Enter, you should see the name of the environment enclosed in brackets.

Now, you can install Django using pip3 the same way we did with the os-wide installation.
Type
pip3 install django
The command will install the latest Django version available. However, if you need to install a specific version, specify it by using == after the keyword Django.
pip3 install django==4.0.0After installing Django, the following additional packages are installed on your virtual environment.
1. Asgiref.
ASGI standard allows the Django app to communicate with a server asynchronously.
The asgiref module provides your Django application with asynchronous and synchronous capabilities.
Therefore, your application can communicate with web servers, frameworks, and other web applications. You can read more at https://asgi.readthedocs.io/en/latest/
2. Sqlparse.
When working with a relational database such as MySQL, the sqlparse module translates and formats SQL statements.
Thus, your Django application can issue queries to the database.
These queries are processed by sqlparse, deconstructing them and returning the necessary columns and tables.
Setting up your first Django project
Your Django installation process is complete. It is now the time to create your first new Django project on your local machine.
To create a project, you need to use the django-admin utility.
First, create a new directory in your preferred location, such as the Desktop folder. To navigate to the Desktop folder, type:
cd ~/DesktopThen create a new directory
mkdir first_django_projectThen create a new project. Type,
django-admin startproject my_project .The command will create a new project called my_project on the current directory.
Note the dot at the end of the command. The dot prevents Django from creating another new directory called my_project.
Instead, it uses the current directory (first_django_project) as the root directory for the project.
If you list the directory’s contents, you will find the project configuration files in the my_project folder and the manage.py file.
The manage.py file acts as the project-specific command-line utility providing various commands when working with Django. It functions similarly to the django-admin utility.

After creating a project, you can now run your Django web application on your local machine using the manage.py command-line utility.
Type the following
python manage.py runserver
After, open your preferred browser, copy the following address and paste it into your address bar
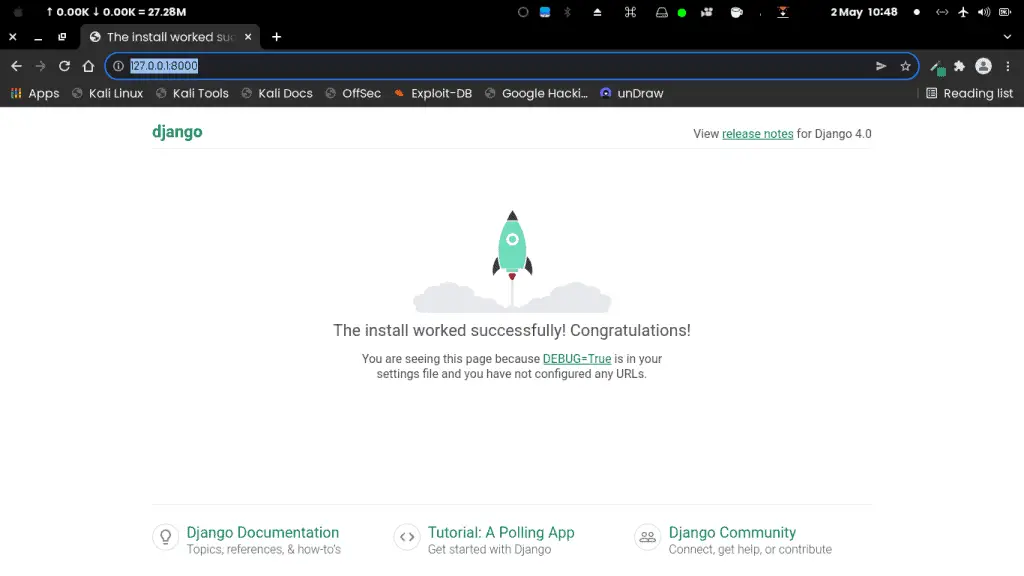
Congratulations, you have successfully installed Django.
If you want to learn more about Python Django web development, check out this incredible resource page that outlines the path and books/courses you need to be a full stack web developer: Ultimate resources for Django web developers.
If you already know Django and want to advance your knowledge, check out Django for professionals book.
In this tutorial, you learned how to
- Navigate through the Linux filesystem and create new directories
- Install Python 3, Pip3, and Virtualenv
- Create new virtual environments and install Django
- Create a new Django project and access your web application from a local browser.
If you have another operating system or you want to switch to Linux and you are curious whether Kali Linux is good for programming, I have provided this guide for you to learn more about programming on Linux.
See ya!

