![]()
How to add sitemap.xml and robots.txt to your Django website
There are things that you may optionally configure for your Django website before it goes live to boost your website search indexing and ranking.
Do you really need a sitemap.xml or robots.txt file for your website?
Though optional, having a sitemap.xml and robots.txt can help search engines discover your website, understand your website, achieve a better design for your site, and define which parts of your website should be crawlable.
What is a sitemap, and why do you need it
A sitemap contains all the links to every significant page or article on your website.
It acts as the map for the search engine to get to specific pages or posts on your website.
Web crawlers such as Google read a sitemap to understand how your website is organized and efficiently find information.
In addition, a sitemap tells the web crawlers the pages and posts significant to your website.
Moreover, it provides additional details on the links and files available on your website.
Besides, a sitemap informs web crawlers how regularly your site or pages update.
Keeping your content updated or adding content regularly boosts your domain authority. Authority goes a long way to building trust between your customers and search engines.
A sitemap helps search engines find all the content you want to be discovered on your website if your site grows in terms of the number of pages and posts.
Besides, help search engines crawl the pages efficiently.
Additionally, you may want to specify some priority of a particular page over other pages.
For example, you may always wish your home and blog pages to be considered valuable to your website.
The reason is: to allow your site visitors to find newly updated content faster.
Search engines rank the most important pages on your website first.
However, assigning your pages a high priority does not mean that it will influence the position of your website on the search engine’s result page. Preference is given based on the content available on your particular website.
There is no cross-referencing with other websites.
For demonstration, let’s create a simple blog using Django
Check this article on setting up a new Django project if you haven’t yet made it: Article link here.
How to create a simple blog with Django
Open the Terminal and type each of the following commands:
cd ~/Desktop
mkdir SimpleDjangoBlog
cd SimpleDjangoBlog
mkdir ~/.virtualenvs && python -m venv ~/.virtualenvs/SimpleDjangoBlogEnv
source ~/.virtualenvs/SimpleDjangoBlogEnv/bin/activate
pip3 install django pillow
Create a new project
django-admin startproject SimpleBlog .Create a new app and register it
python manage.py startapp blogINSTALLED_APPS = [
'django.contrib.admin',
'django.contrib.auth',
'django.contrib.contenttypes',
'django.contrib.sessions',
'django.contrib.messages',
'django.contrib.staticfiles',
'blog.apps.BlogConfig',
]Add sites app, SITE_ID config, and define the templates folder. Ensure that you have the APP_DIRS variable set to True so Django can find the app-level templates directory.
INSTALLED_APPS = [
    'django.contrib.admin',
    'django.contrib.auth',
    'django.contrib.contenttypes',
    'django.contrib.sessions',
    'django.contrib.messages',
    'django.contrib.staticfiles',

    'django.contrib.sites',
    'blog.apps.BlogConfig',
]

...

TEMPLATES = [
    {
        'BACKEND': 'django.template.backends.django.DjangoTemplates',
        'DIRS': [BASE_DIR / 'templates'],
        'APP_DIRS': True,
        'OPTIONS': {
            'context_processors': [
                'django.template.context_processors.debug',
                'django.template.context_processors.request',
                'django.contrib.auth.context_processors.auth',
                'django.contrib.messages.context_processors.messages',
            ],
        },
    },
]
You can set SITE_ID if you are using a single database for multiple sites
SITE_ID = 1Open the blog app models.py and define the blog fields
from django.db import models
from django.urls import reverse


class BlogPost(models.Model):

    STATUS_CHOICES = [
        ('DRAFT', 'Draft'),
        ('PUBLISHED', 'Published'),
    ]

    post_title = models.CharField(max_length=90)
    slug = models.SlugField()
    meta_description = models.CharField(max_length=1000)
    content = models.TextField()
    featured_image = models.ImageField(upload_to='blog/images')
    created_on = models.DateTimeField(auto_now_add=True)
    published_on = models.DateTimeField(auto_now=True)
    status = models.CharField(max_length=10, choices=STATUS_CHOICES, default='DRAFT')

    class Meta:
        ordering = ('-published_on', )

    def __str__(self):
        return self.post_title

    def get_absolute_url(self):
        return reverse("blogpost", args={str(self.slug)})
Then run the migrations to record a change and persist the changes to the database
python manage.py makemigrations && python manage.py migrateTo be able to add posts using the admin page, register the blogpost object. To do so, open the blog app admin.py and type the following:
from django.contrib import admin

from .models import BlogPost


@admin.register(BlogPost)
class BlogPostAdmin(admin.ModelAdmin):
    list_display: ('post_title', 'created_on', 'published_on', 'meta_description')
    prepopulated_fields = {'slug': ('post_title',), }
Then, create a superuser account, log in to your Django blog, and create a few blog posts.
python manage.py createsuperuser

Create the list view to display all posts on one page and a detail view to display each post separately. Open the views.py file of the blog app and type the following:
from django.views.generic import ListView, DetailView
from django.shortcuts import render

from .models import BlogPost


class BlogPostListView(ListView):
    model = BlogPost
    template_name = "blog/list.html"
    context_object_name = 'blogposts'


class BlogPostDetailView(DetailView):
    model = BlogPost
    template_name = "blog/detail.html"
    context_object_name = 'blogpost'
Create the URLs for the views above. Create urls.py file inside the blog app folder and add the following lines:
from django.urls import path

from .views import BlogPostListView, BlogPostDetailView


urlpatterns = [
    path('', BlogPostListView.as_view(), name='blogposts'),
    path('<str:slug>/', BlogPostDetailView.as_view(), name='blogpost'),
]
Add your blog app URLs to the project’s urls.py app.
from django.contrib import admin
from django.urls import path, include

urlpatterns = [
    path('admin/', admin.site.urls),
    path('blog/', include('blog.urls')),
]
First, create the templates folder at the root directory of the project. Inside the directory, create a folder called blog. Inside the blog directory, create list.html and detail.html files.
Type the following on the Terminal to create the directories and files:
mkdir templates templates/blog && cd templates/blog

touch list.html detail.html
For list.html, enter the code:
<h1>Articles</h1>
{% for blogpost in blogposts %}
  <ul>
    <li><a href="{{ blogpost.get_absolute_url }}">{{ blogpost.post_title }}</a></li>
  </ul>
{% endfor %}
For detail.html:
<div>
    <h2>{{ blogpost.post_title }}</h2>
    <p>{{ blogpost.content }}</p>
</div>
You should have something like if you open http://127.0.0.1:8000/blog/

Now is the time to add a sitemap.xml to our Django blog
How to add a sitemap.xml to your Django website
After you have completed designing and implementing your Django website, the last thing you can do is add a sitemap.xml before deploying.
Here’s how you can set up a dynamic sitemap for your Django website.
Open your main settings.py file and add the sites and sitemaps app to the list of your installed apps. It should look like this:

After adding the sites app, define the SITE_ID variable at the end of the settings.py file
...
STATIC_URL = '/static/'

# Default primary key field type
# https://docs.djangoproject.com/en/3.2/ref/settings/#default-auto-field

DEFAULT_AUTO_FIELD = 'django.db.models.BigAutoField'

SITE_ID = 1 #declare the site id variable here
The SITE_ID variable is essential when using multiple websites on a single database. The SITE_ID variable defines the database ID of the website associated with that particular settings file. Therefore, if you have multiple sites on a single database, the SITE_ID should be unique for every website.
Update your database by running the migrate command.
python manage.py migrateCreate a new file (sitemap.py) in your blog directory. Add the following to the file:
from django.contrib.sitemaps import Sitemap

# import the model that has the posts that you want to be on the sitemap
from .models import BlogPost


class BlogPostSitemap(Sitemap):
    # define how often your website will change, the priority, and the protocol used to access your site
    changefreq = 'weekly' # can be weekly daily always monthly yearly or never
    priority = 1.0   # on a scale of 0.0 to 1.0
    protocol = 'http'  # use https when you deploy your website and are using a secure connection

    # define the posts you want in your sitemap here
    def items(self):
        return BlogPost.objects.all()

    # will return the last time an article was updated
    def lastmod(self, obj):
        return obj.published_on

    # returns the URL of the article object
    def location(self, obj):
        return f'/blog/{obj.slug}'
After defining and configuring the items displayed in your sitemap, add the sitemap URL to the project’s urls.py file.
Your final project’s urls.py should look like this:
from django.contrib import admin
from django.contrib.sitemaps.views import sitemap
from django.urls import path, include

from blog.sitemap import BlogPostSitemap

sitemaps = {
    'blog': BlogPostSitemap,
}

urlpatterns = [
    path('admin/', admin.site.urls),
    path('blog/', include('blog.urls')),
    path('sitemap.xml', sitemap, {'sitemaps': sitemaps}, name='django.contrib.sitemaps.views.sitemap'),
]
Open http://127.0.0.1:8000/sitemap.xml to view your new sitemap that is dynamically created.
Every time you create a new blog post, the sitemap automatically updates.
You should see all your blog posts with additional information, such as the last update of a post.

If you have noticed, we have the URL set to example.com.
Do not worry about that.
Once you deploy your website, the link will automatically update to the correct URL using the domain name.
Creating a sitemap using Django is as easy as that.
Once you deploy your website and publish many articles, submit the sitemap to Google Search Console.
In the second part of this tutorial, let’s set up a robots.txt for our Django application.
What is a robots.txt, and why do you need it
A robots.txt file informs any web crawler that accesses your website which URLs of your website to crawl.
Sometimes, too many search engines may be crawling your website simultaneously, leading to overloading.
Telling the search engines to crawl particular pages reduces the total amount of requests made to your site.
Additionally, you can block some web crawlers from accessing your website using a robots.txt file.
However, this does not mean that Google does not index the left-out pages.
They are indexed.
To prevent indexing, you should edit the header section of each page by adding a noindex meta tag.
<META NAME="robots" CONTENT="noindex">Optionally, you can protect the page with a password.
How to add a robots.txt file to your Django website
Creating a robots.txt file for your Django website is very easy.
You need to create a URL and link that URL to the robots.txt file.
Inside the main templates folder, create a new file called robots.txt and add the following lines:
User-Agent: [specify search engine crawler]
Disallow: [disallowed URL]
Disallow: [disallowed URL]

Sitemap: https://yourdomain.com/sitemap.xml
Be sure to follow the syntax.
The User-Agent defines the name of the search engine. Your robots.txt should look like this if you want Google to crawl your Django website.
User-Agent: Googlebot
Disallow: [disallowed URL]

Sitemap: https://domain.com/sitemap.xml
You can set multiple web crawlers and disallow numerous pages on your website.
Your final file may look like this:
User-Agent: Googlebot
User-Agent: Bingbot

Disallow: /contact-page

Allow: /home
Allow: /blog

Sitemap: https://domain.com/sitemap.xml
You may use an asterisk to allow web crawlers from accessing your website.
You may also use an asterisk to allow or disallow all the pages on your website.
User-Agent: *


Allow: *

Sitemap: https://domain.com/sitemap.xml
After creating your robots.txt, open the project’s urls.py and add the following lines:
"""SimpleBlog URL Configuration

The `urlpatterns` list routes URLs to views. For more information please see:
    https://docs.djangoproject.com/en/3.2/topics/http/urls/
Examples:
Function views
    1. Add an import:  from my_app import views
    2. Add a URL to urlpatterns:  path('', views.home, name='home')
Class-based views
    1. Add an import:  from other_app.views import Home
    2. Add a URL to urlpatterns:  path('', Home.as_view(), name='home')
Including another URLconf
    1. Import the include() function: from django.urls import include, path
    2. Add a URL to urlpatterns:  path('blog/', include('blog.urls'))
"""
from django.contrib import admin
from django.contrib.sitemaps.views import sitemap
from django.urls import path, include

from blog.sitemap import BlogPostSitemap
from django.views.generic.base import TemplateView

sitemaps = {
    'blog': BlogPostSitemap,
}

urlpatterns = [
    path('admin/', admin.site.urls),
    path('blog/', include('blog.urls')),
    path('sitemap.xml', sitemap, {'sitemaps': sitemaps}, name='django.contrib.sitemaps.views.sitemap'),

    path('robots.txt', TemplateView.as_view(template_name='robots.txt', content_type='text/plain')),
]
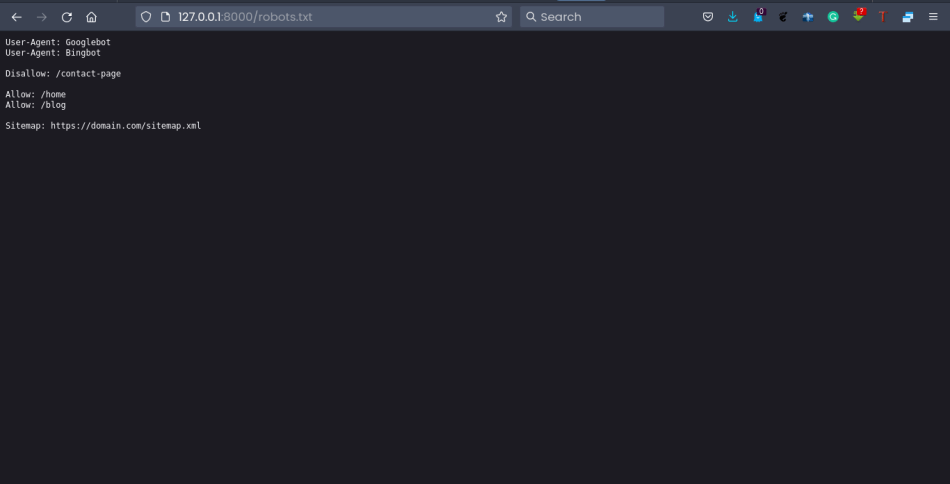
Open http://127.0.0.1:8000/robots.txt to view the robots.txt URL.
Your Django website is now ready to be crawled by the web crawlers specified in your robots.txt.
How to add sitemap.xml to your robots.txt
Here’s how you can add sitemap.xml to your robots.txt for your Django website:
Step 1: Locate your Django website’s sitemap.xml URL
Step 2: Add your sitemap.xml URL to your robots.txt
Let’s say the URL to your website is domain.com/sitemap.xml. You should copy this URL and add it to your robots.txt at the end as follows
User-Agent: Googlebot
User-Agent: Bingbot

Disallow: /contact-page

Allow: /home
Allow: /blog

Sitemap: https://domain.com/sitemap.xml
Sitemap: https://domain.com/post-sitemap.xml
Can a website have more than two sitemap files?
A website can have more than one sitemap.xml file. If you have more than one sitemap.xml file, you may add them at the end of your robots.txt file. For demonstration, look at the last line of this example robots.txt file. This indicates that the website has two sitemap.xml files.
User-agent:*
Disallow
Sitemap: https://www.domain.com/sitemap.xml
Sitemap: https://www.domain.com/post-sitemap.xml
That’s it for this article.
I hope you have enjoyed it and that you have successfully created a sitemap and robots.txt files for your Django website.
See you in my next article.

