![]()
How to host Django website on AWS using Gunicorn and NGINX
Your Django website is available locally, and you need to deploy it on a Linux server available on the AWS cloud.
You deploy the Django website on a Linux server using Gunicorn as the WSGI HTTP server and NGINX as the webserver to handle load balancing, HTTP caching, and reverse proxying.
Deploying Django on a Linux server is very easy.
We will use AWS cloud to provide a free Ubuntu instance to host the website.
However, it would help if you stayed alert to the usage limit to avoid recurring charges that may be incurred when you use such instances.
If you have instances you may not be using, delete them.
How to deploy Django on AWS Linux instance
Before we deploy our web application, we will need some concepts and tools to understand how the website works in a production environment.
- Why a cloud server is needed to deploy Django
- What is AWS Cloud
- What is a Linux instance
- What is Gunicorn, and why it is important to our Django website
- What is NGINX, and what purpose does it serve
Why a cloud server is needed to deploy Django
A cloud server is similar to a traditional physical server.
However, a cloud server resides on the web, where the server resources are pooled, centralized, and delivered over a network.
These servers deliver processing power, storage, memory, and applications over the internet.
Therefore, one can use their preferred operating system to manage and deploy web applications, especially when developed using Django.
What is AWS Cloud
You will use AWS Cloud to deploy the Django application in this setup.
AWS Cloud provides the necessary server resources to host Django and run it without downtime.
Amazon Web Services (AWS) cloud is a cloud platform that offers server services from their data centers to multiple users on demand.
AWS cloud provides users with servers, storage, remote computing, mobile development, email, and networking services.
Among these services is the server service that a company or a developer may utilize to host their Django website.
One has the freedom to choose between Windows and Linux operating systems.
We will use a Linux system installed on an instance in this setup.
What is a Linux instance?
AWS Cloud provides various services to its users, one of which is providing a cloud computing platform.
Generally, when purchasing a virtual server, providers provide you with the option of managing them yourself, or they manage it for you.
With AWS, they provide users with EC2 instances that offer scalable computing capacity.
Therefore, one focuses on developing applications rather than combining application and server management.
With an EC2 instance, you can develop and deploy applications faster without worrying about the initial server setup, security, performance, and reliability.
Additionally, AWS provides you with an easy-to-use dashboard to manage the resources on the server, such as memory and storage.
Additional applications are needed when hosting your Django application on a Linux server, including NGINX and Gunicorn.
What is NGINX, and how does it work
NGINX is an example of a web server.
NGINX server provides email proxying, reverse proxying, and load balancing services to a web application, in this case, the Django app.
The web server is responsible for providing reliable services by processing many requests simultaneously.
Where the traffic to a website grows, the webserver is well capable of adjusting the level of performance for the services to meet the user’s traffic.
As you may have noticed, we have introduced several concepts you may not be aware of, such as reverse proxy, email proxy, and load balancing.
Generally,
1. NGINX acts as a reverse proxy
NGINX handles requests made by client applications such as the Chrome browser and the backend server, which processes the information. In this case, Django processes the request.
An example of a request would be to display the home page of our web application.
After the request has been processed, the request is sent back to the client application through the same intermediary used to initiate the request.
2. NGINX acts as an email proxy
NGINX acts as an email proxy by providing the IMAP protocol that allows web-based email service whenever you send emails or receive messages through a contact form that your Django website handles.
Additionally, NGINX supports POP3 and SMTP.
3. NGINX acts as a load balancer
NGINX resides between the client and server; it is responsible for processing and assigning requests from different clients on the internet.
Sometimes, too many clients may send requests, leading to overwhelmed server resources.
NGINX ensures that no one server is overwhelmed by routing client requests across all the servers to achieve maximum speed and performance.
Django’s built-in “python manage.py runserver” server cannot be used in a production environment because it can fail performance, reliability, and security tests.
Therefore, a web server such as NGINX is a secure, reliable, and performance-tested approach to serving your Django website is more preferred.
What is Gunicorn, and why it is important to our Django website
Another important interface is the gunicorn. Gunicorn serves as the HTTP server for Python applications.
As the majority of the web servers, such as NGINX, are not natively developed to understand Python language, one must interface with them for communication to happen.
The communication happens between Django, an interface such as WSGI and ASGI, and the NGINX webserver.
Gunicorn acts as the intermediary between Python Django and the Nginx server.
Gunicorn receives requests from the NGINX server and decides on the most effective and efficient way of handling such requests.
Gunicorn handles all Python processes and services Django requires to process requests from the client application through NGINX.
Gunicorn allows the server to run multiple Python processes within a single Linux instance.
After setting up an EC2 instance with all the applications, services, and operating system, your Django web application will be ready to deploy.
But first, I will show you how to set up an EC2 instance on AWS with a free tier limit.
A free limit on AWS has all the resources required to test deployment, provided you do not exceed the tier limit.
Setting up AWS free tier account
Follow this link to access the AWS account creation page.
After filling in your information, you should have a free tier account that you can use to test your Django application live.
You can always upgrade to a paid account based on your usage requirements.
Setting up a Linux instance
After successful account creation, you will be redirected to your account dashboard.
On the left, look for the services tab. To the left of the link, use the search bar to search for the EC2 service you will use to create a Linux instance.
You should see a page similar to the one shown below.
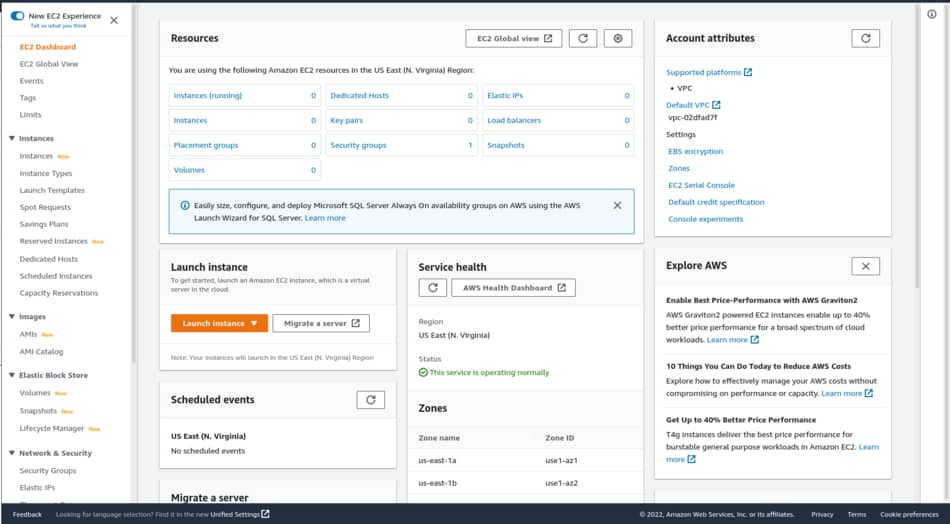
Click on Launch instance to create a new Linux instance.
Type the name you want to use for your instance.
Under Application and OS images (Amazon Machine Image), choose an Ubuntu server that is free tier eligible as your Linux instance.
Select t2.micro instance type. The instance should be free tier eligible.
Click on create new key pair and provide any name.
Click on Create instance and wait for the process to complete.
Click on View all instances to browse the newly-created instance.
Here, you find all the information you need for your server, such as the IPV4 address, DNS, performance monitoring, etc.
Connecting to your Linux instance
You connect to your Linux instance easily while using ssh. It is easier to set up and connect. Here’s how to connect to your EC2 Linux instance:
- On the EC2 Dashboard, click on the Instances(running) link to view all your active instances. Under the list of instances, click on the instance we had created earlier.
- On the top right corner, you should find the connect button. Click on it and navigate to the SSH Client tab.
- When you were creating your instance, you created a private key. Download the .pem file and save it to any location.
- Open a Terminal window on your local machine.
- Navigate to the location where you saved the file and type the following commands
- chmod 400 name_of_the_file.pem
- Go back to your page where you had the connection details for your EC2
- Copy the example code provided to connect to your instance
- Paste the code on the Terminal and execute. That current terminal window will be connected to your Linux instance via ssh. You will use the window to install Python needed to run Django on your Linux server.
Once you are connected to your instance, run the following commands on the Terminal:
sudo apt updatesudo apt install python3 python3-pip nginx python3-venvCreate a new directory and virtual environment for your Django application
cd /home/ubuntu && mkdir django_projectscd django_projects && mkdir first_django_projectcd first_django_projectpython3 -m venv django_project_envsource django_project_env/bin/activateInstall Django and its dependencies on your Linux server
After activating the virtual environment, install Django. Here’s how you do it:
pip install django gunicornPush your Django project’s files to your server
Push your local Django project to a remote location such as GitHub or Bitbucket using git.
Then, pull your repository into the current directory you created earlier on your Linux server.
git clone https://github.com/username/repo_name.gitConnect your Django app with Nginx and Gunicorn
Ensure your project settings.py file has EC2 IPV4 address on the ALLOWED_HOSTS list variable.
Navigate to the /etc/nginx/sites-enabled/ directory to set up your NGINX
cd /etc/nginx/sites-enabled/

sudo nano default
Add the following line under location /
proxy_pass HTTP://0.0.0.0:8000;Your final file should look like this:
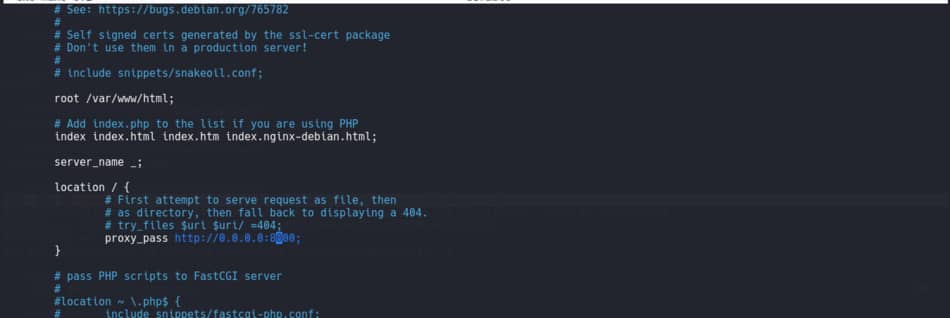
After editing the file, save and close it. Then, restart Nginx.
sudo service nginx restartNavigate back to your project’s folder and activate the environment if it is deactivated.
Run the following command in the same directory where the manage.py and project folder resides.
gunicorn YourProjectName.wsgi:application --bind 0.0.0.0:8000You should get a response similar to the one below:

Go to your EC2 instance Dashboard. Under Instance summary …, locate the instance public IPv4 DNS and click to open a new tab.
Your new Django website should be available live.
Anyone on the internet can now access your website.
Congratulations.

