![]()
Can you have multiple DKIM records for a domain name?

How does DKIM work and how can I configure a domain name to have multiple DKIM records?
You may ask.
Well,
You can have more than one DKIM record for a single domain name in its DNS records configuration list.
Having multiple DKIM DNS records for a domain name allows you to sign multiple email services, configure DKIM records for multiple subdomains, and achieve DKIM key rotation for security reasons.
We’ll look at each opportunity that a domain name with multiple DKIM DNS records have.
But first,
What is a DKIM record?
A DKIM record is a DNS record that acts as a digital signature to verify that an email is originating from the server it claims to be from in the SPF record. It is a virtual seal that helps achieve the authenticity of an email.
A DKIM record is added to a domain name’s DNS record list as a TXT record type.
DKIM means Domainkeys Identified Mail
In summary, A DKIM works like this to achieve email authentication:
- When sending an email, your email server will add a unique digital signature that uses a private key. The private key is only known to the sender, your mail server.
- The email is sent from the mail server configured for your domain name to the recipient
- Before accepting the email, the recipient server, say, gmail.com, performs an SPF checks to check the originating email server. If it passes, the recipient server checks for the DKIM record signature in the domain name’s DNS record.
- The recipient mail server retrieves the public key signature present in the DNS records list of your domain, from the DKIM record.
- The recipient mail server verifies the public signature by matching it with the private signature in the mail header.
- If the signature is valid and matches the public key, then the email is marked as genuine and it is accepted.
- If there is a mismatch, then the email is considered forged or tampered with.
That’s how emails are basically sent from your custom domain name, say [email protected] to the recipient, say [email protected].
Due to some needs such as having multiple mail serving services, e.g. your primary domain name registrar and a service like Zoho, you may need to add more than one DKIM record for your domain name.
Here’s the benefit of adding multiple DKIM records.
What is the benefit of having multiple DKIM records for a domain name?
Having multiple DKIM records for a domain name allows you to configure more than one email service for a single domain, add DKIM records for subdomains, and enhance email security.
Configure more than one email service
The primary advantage of adding multiple DKIM records is to have multiple mail-serving services for your custom domain email.
So, let’s say you have the mail address, [email protected].
However, you want to use the mail server that your hosting provider, say Namecheap, has made available for you.
On top of your Namecheap mail servers, you also want to integrate the Zoho mailing service for your custom domain email.
To effectively verify the DKIM signatures for each email sent from either of the two services, you need two DKIM records.
Because you can add more than one DKIM record, it becomes relatively easy to add a TXT record holding Namecheap’s DKIM signature and Zoho’s DKIM signature.
It is as easy as that!
However, remember to add a valid SPF record to verify both mail servers’ addresses. Failing to create a valid SPF record will lead to your email rejected or delivered as spam.
Check out this article for a guide on how to merge SPF records from more than one mail server.
Add multiple DKIM records for each subdomain under the main domain name
If you have multiple subdomains from your primary domain name, say, dashboard.yourdomainname.com and services.yourdomainname.com, you will need to add the DKIM records for each of your subdomains.
That way, if you have a custom email address, say [email protected], the email DKIM signature authentication can be performed.
Enhance email security using rotating DKIM keys
DNS DKIM configurations allow DKIM key rotation, which is the practice of regularly changing the cryptographic keys used to sign emails with DKIM.
That way, you are able to mitigate risks that arise from hackers compromising your keys, by cracking or stealing them.
DKIM rotation helps:
- Improve email security through regular changing of keys used to sign emails.
- Rotating keys can help mitigate future risks that may arise from cryptographic algorithms that may weaken over time or become vulnerable to new attacks.
How to add multiple DKIM records for a single domain name
Here is the process of generating new DKIM records using your email provider control panel and adding them to your domain name DNS records.
Step 1: Access DKIM records from each of your mail provider control panel
You need to get a set of DKIM key pairs (private and public) with each having its unique selector.
To do that, you need to access your mail service provider control panel. If you are using shared hosting, you can use the cPanel dashboard.
Login to your mail services dashboard. In this case, I am using the cPanel.
Locate the Email Deliverability tool in your dashboard and open the app.
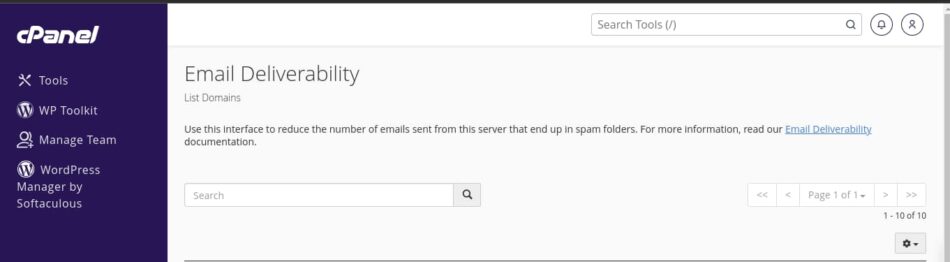
Select the domain name you want its DKIM key pairs and press Manage.
In the “Email Deliverability” interface, locate the DKIM section.
Copy the DKIM Name and Value.
Paste the name and value on a new text document or just access your DNS record management dashboard.
Do the same for the next mail-serving provider, e.g. Zoho.
Step 2: Configure the DNS records for your domain name
After copying the DKIM Name and Value, you need to create a new TXT DNS record type to hold these values.
To do that, log in to your domain name provider dashboard and access the DNS management dashboard.
If you are using Cloudflare, log in to your Cloudflare dashboard, select your domain name, and access the DNS tab.
Create a new DNS record of type TXT.
In the name field, paste the name of the first DKIM record from let’s say your primary domain name registrar we got from the cPanel dashboard.
Paste the value too and press the “Save” or “Add record” button.
Do the same for the next DKIM record.
Press the “Create record” or “Add record” button, select the record type as TXT, and paste the Name and Value into the corresponding fields.
In this case, we paste the DKIM record Name and Value from Zoho.
Hit Save.
And that’s it
If you do not have an SPF record that covers mail serving from multiple IP addresses or servers, be sure to create one and add it as another TXT DNS record type.
Step 3: Verify DKIM records propagation
After adding all your DKIM records, wait for a few minutes for the propagation to occur.
Step 4: Test DKIM signing for each mail server
After propagation, try sending emails from each of your mail servers or subdomain.
To recap
Having multiple DKIM records allows you to verify multiple mail servers to send emails on behalf of your domain name.
So, as an example, if a domain name has two email servers, it must have
DKIM for server 1:
Selector: server1
DKIM public key: <server1-public-key>
And for server 2:
Selector: server2
DKIM public key: <server2-public-key>
Each email server will use its respective DKIM private key to sign outgoing emails, and the recipient’s mail server will use the corresponding public key from the DKIM DNS record to verify the signature.
Thus, you are able to configure your domain name to allow DKIM signing for each server, sending emails from multiple servers.
As each DKIM record will correspond with a unique selector and public key for each specific email server, the recipient server can discern the originating mail server, verify the signatures, and get your emails delivered.
One thing that you mustn’t forget is to add the SPF mechanisms for each mail server in your domain name SPF record.

