![]()
How to install Kali Linux alongside Windows 10 (Dual Boot)
Setting up a Windows and Linux dual boot on your machine is as easy as setting up Windows on a new machine or hard disk.
You need to create two partitions that you use to install the two operating systems. Windows resides inside a primary partition, while Linux will reside on a newly-created partition. As an additional step after installing Kali Linux, you need to update GRUB to record the two operating systems.
I have always wanted to test new operating systems other than Windows 10.
Not to say that Windows has a bad user experience or is terrible. Windows can be great for a number of reasons that may include using the Microsoft Office suite and games.
However, I experienced a “should-I-really-remove-windows” dread to testing a new operating system.
I researched a couple of ways to install other operating systems without removing Windows.
One of the options was to use Linux OS on a virtual machine. But the performance was not always great.
That’s why I opted to choose a new way of installing other operating systems alongside my “never-leaving-you” Windows.
The approach was setting up a Windows and Kali Linux dual boot.
Pre-requisites
- Download the Kali Linux ISO image here. Choose the bare metal release.
- Download the latest version of the Rufus tool here.
- 8 GB or more USB drive
Here are the steps that you will follow to set up a dual boot for Windows and Kali Linux
- Create a Kali Linux OS bootable USB
- Set up a separate partition using the Disk Manager on Windows 10
- Configure your BIOS to disable fast boot and enable legacy boot options
- Boot using the newly-created bootable USB
- Install Kali Linux and GRUB
- Boot into your new Kali installation
How to dual boot Kali Linux on Windows 10
Step 1: Create Kali Linux Bootable USB
This step requires the pre-requisite of having downloaded the Linux image and the Rufus tool.
You use the Rufus tool to set up a bootable USB drive.
The setup process involves writing all the essential system booting information and files that the computer hardware will use.
Follow these steps to set up your USB:
- Run the Rufus tool as an Administrator on your Windows 10 machine
- Under the Device tab, select your USB device
- Under the Boot Selection tab, click the SELECT button and choose the Kali Linux image you downloaded.
- Choose Partition scheme as MBR and leave everything else as default.
- Click on START
- If you are prompted to download some files, click yes and let the files download.
- Additionally, you can be prompted to write the Linux image in DD image mode or ISO image mode. I find that the DD image mode works all the time. You try either option and see which one works for you. If during the installation you get a message that the installation media cannot be detected and you used the ISO image mode, abort the installation, reboot again to Windows, and use the DD write method.
- After the setup has been completed, you can now set up a new partition to install Kali Linux.
Step 2: Perform a Manual Disk Partition for Kali Linux Dual Boot
A partition is responsible for separating the Windows and Kali Linux files on the same drive.
Another reason for creating a separate partition is that Windows uses a different filesystem compared to Linux. Linux uses EXT4 filesystem and Windows uses NTFS filesystem.
To set up a separate partition follow these steps:
- Open the Disk Manager by pressing the Windows key + R. Then type diskmgmt.msc and press Enter.
- Select the partition where you have your Windows installed. In this case, the partition will be labelled Local Disk C.
- Right-click on the partition and select the Shrink Volume option.
- Set the size to 51200 MB, which is equivalent to 50 GB, or any size greater than 20 GB that you prefer. The rule to figure out the actual size in MBs is to multiply the number of GBs by 1024. For example, 20 GB will be (20 x 1024 = 20480) MB.
- After setting the size, click on Shrink and let the process complete.
- A new Unallocated partition will be created.
- Close the Disk Manager and switch your computer.
ALTERNATIVELY, you can skip this step and set it up later when installing your Kali Linux. See the Step:
Step 3: Configure your BIOS to disable fast boot and enable legacy boot options
Press and power button and repeatedly press the F1 key on your keyboard to boot into BIOS. Booting into BIOS will probably be the option associated with the F9 key.
Most computer manufacturers configure the PC to boot only using trusted firmware.
However, you find that most of the firmware on most devices supports Microsoft operating systems such as Windows 10.
Therefore, it is necessary to disable Secure boot to be able to boot into Kali Linux operating system.
Remember how we chose the partition scheme to be MBR.
This step was necessary to define a disk partitioning scheme that conforms with all operating systems.
All operating systems can be installed on an MBR–partitioned scheme.
Other operating systems such as some 64-bit windows versions only use the GPT.
Setting the partition scheme to MBR ensures that Windows 10 and Kali Linux operating systems are supported.
To disable secure boot:
Navigate to the Security tab and check whether Secure Boot is enabled. Choose the Disabled option to disable it.
To set up the boot sequence, navigate to boot options and select Legacy boot from the list of options.
Beware that these options can be located under different tabs for different devices.
You may search how to boot into bios, how to set up legacy boot, and how to disable secure boot.
After you have completed the steps, click on save and exit. Your device should restart.
Switch off your computer.
Step 4: Boot using the newly-created bootable USB
Insert your thumb drive into your machine.
Press the power button and repeatedly press the ESC key until you are prompted with various options that include booting from the primary drive or USB, booting into BIOS, e.t.c
How to install Kali Linux
Kali Linux is a great option for web development, as it comes pre-installed with many tools and packages that can be useful for building and testing websites.
Installing Kali Linux is a very straightforward process, but it does require some knowledge and preparation.
After, booting into your Kali bootable USB drive, here are the basic steps you will need to take to get started.
Step I: Install Kali Linux and GRUB
Choose boot using USB and the screen should display the following image.
Choose Graphical install to start installing Kali Linux.
If you have reached this point, installing Kali Linux should be easy. Follow the steps prompted, fill in the required information appropriately, and keep clicking continue.
You may use the settings in the screenshots below:
Select language

Select your location

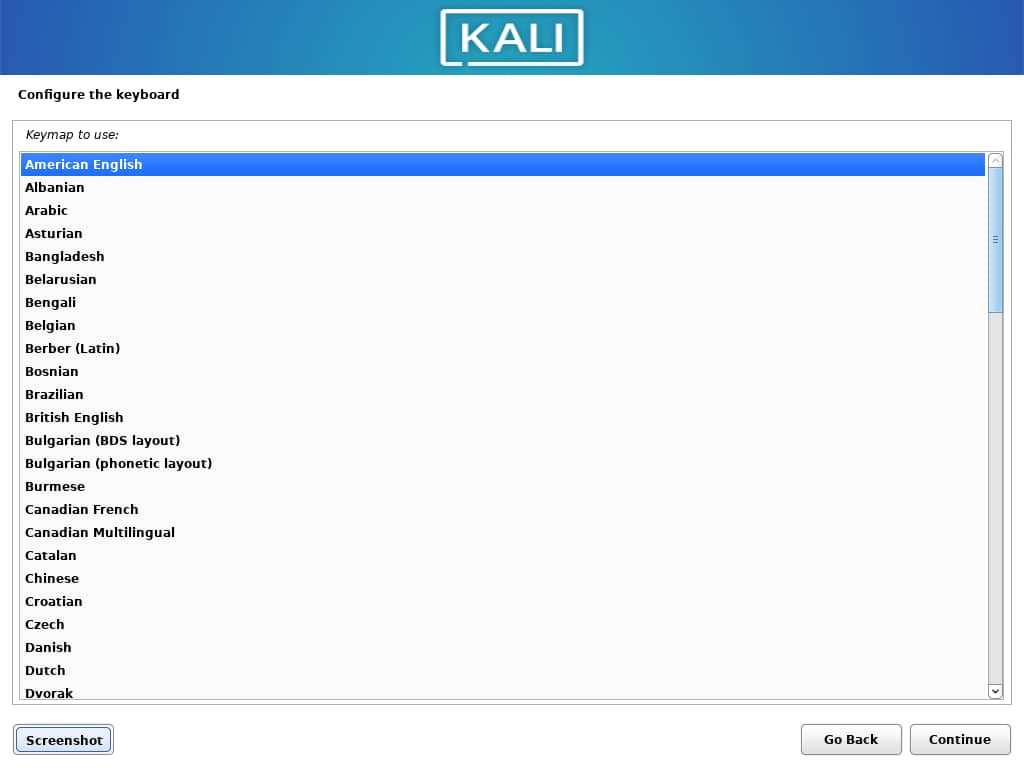
Configure the keyboard layout
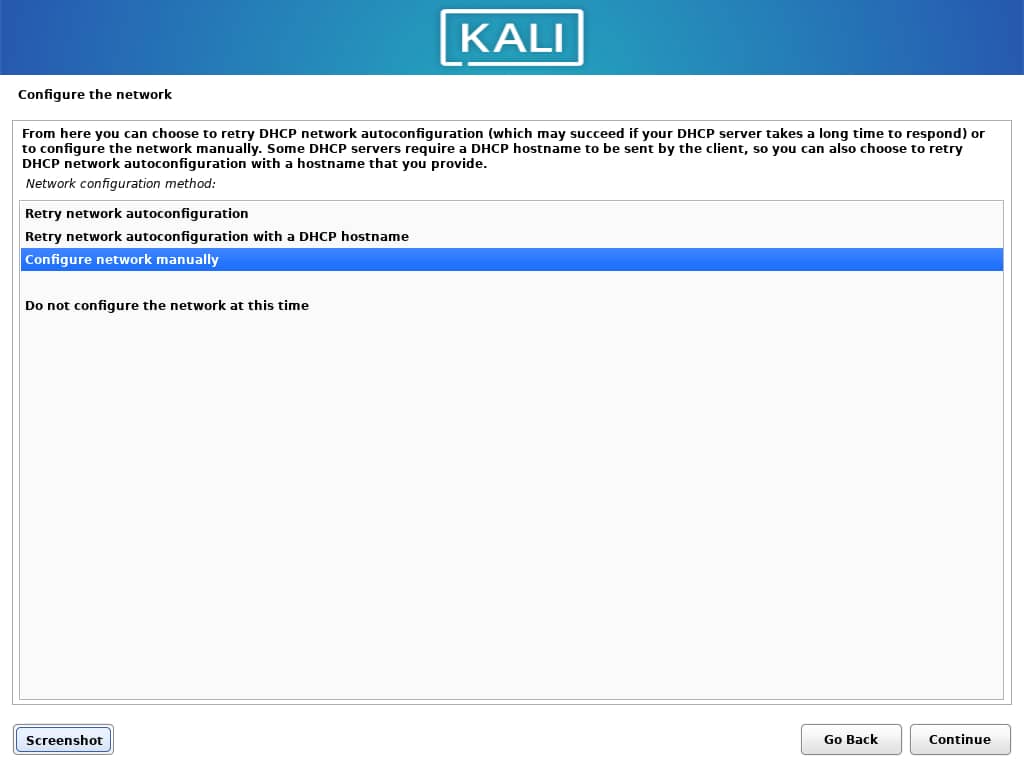
Select either WIFI or LAN network connection
Alternatively, you can choose to set up the network later if the connection fails. Choose “Do not configure network at this time and click on continue”.
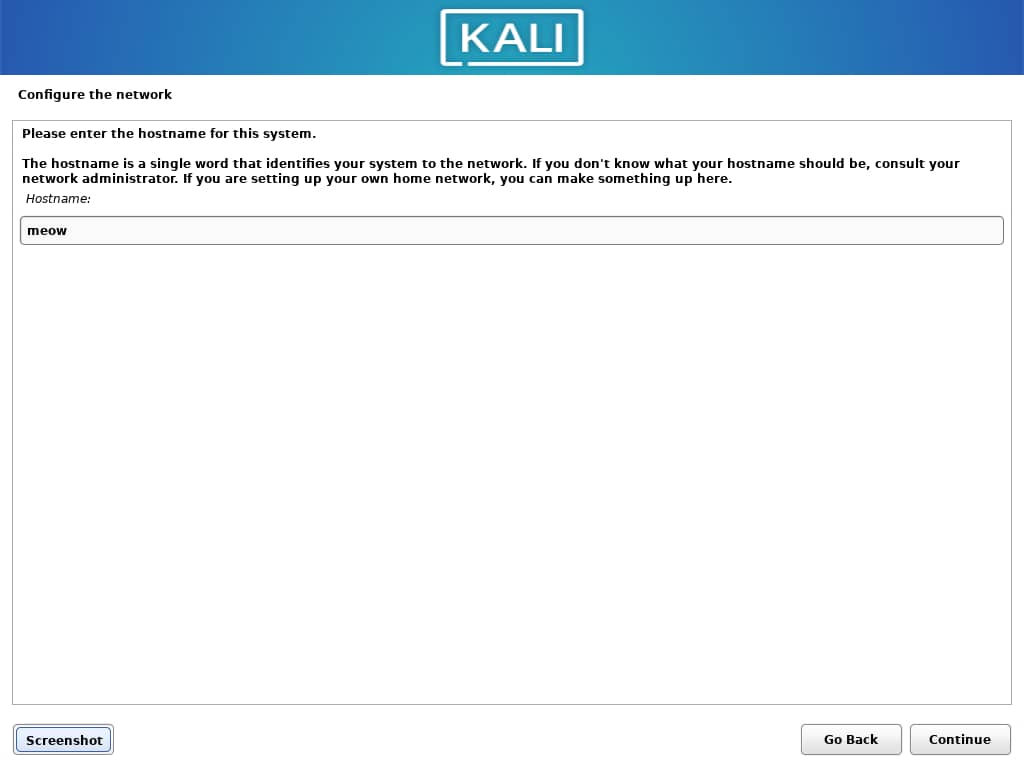
Select the hostname to use for the system. You can also use any name.
Skip the domain name part
Setup your Full name, username, and password that you will use on your machine.

Set up the clock and proceed to partition disks
Select Manual in the Partition disks section and click continue
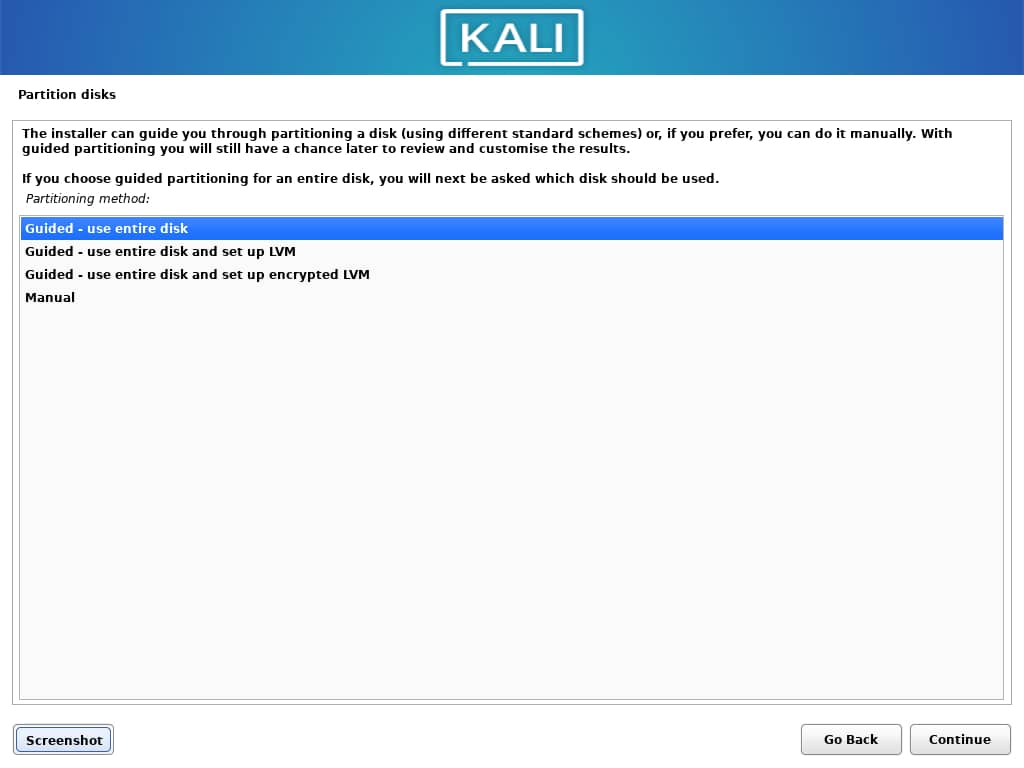
Choose the “All files in one partition …” option and click on continue
In the partition disks section, you will see the free space that you created as a partition in step 2. Select the partition and click continue.
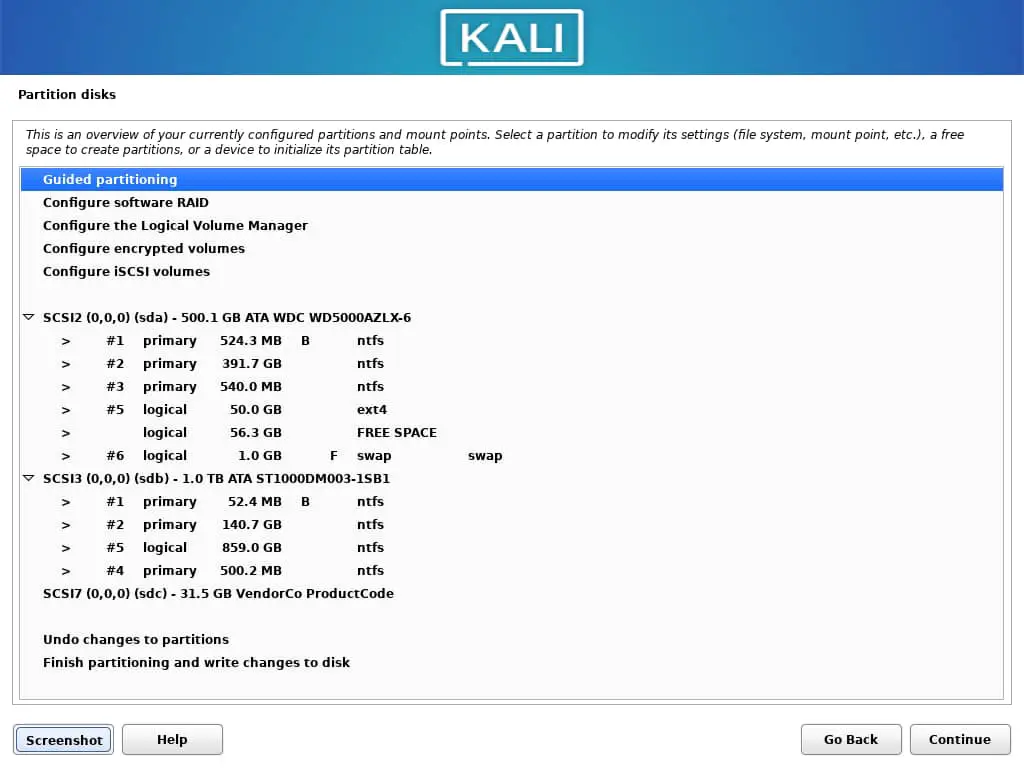
You are good to proceed if you had created a partition earlier.
How to create a partition for Kali Linux
However, if you had not set up your partition, I will show you how to use the installer to set up a new partition that is separate from that of your Windows. Follow these steps:
- Choose the partition where you have installed Windows
- Double click on the partition, click on the “Resize the partition …” option and click continue.
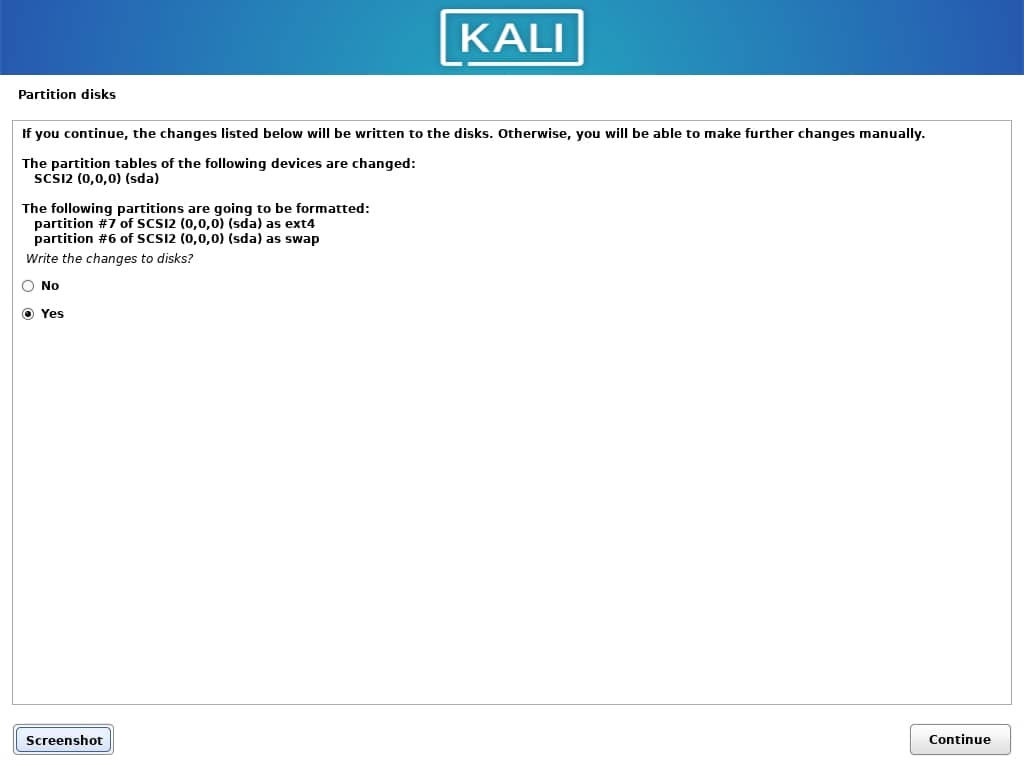
- Choose Yes when prompted to write the previous change to disk and continue
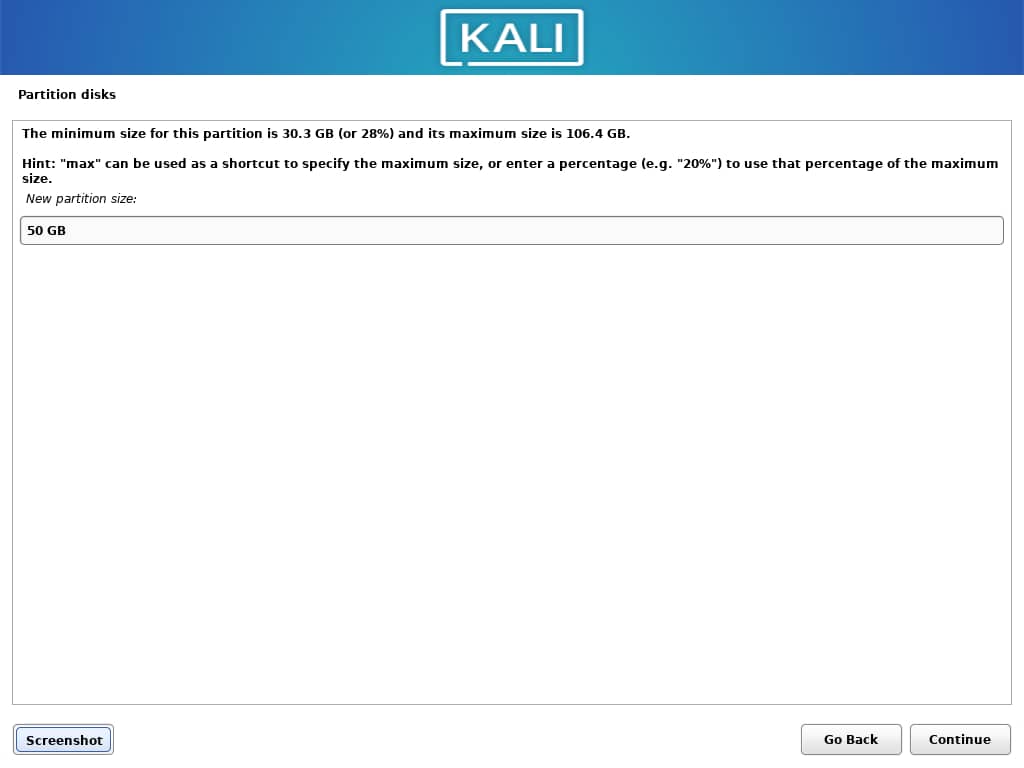
- Set the size that you want to have for your Linux and click continue
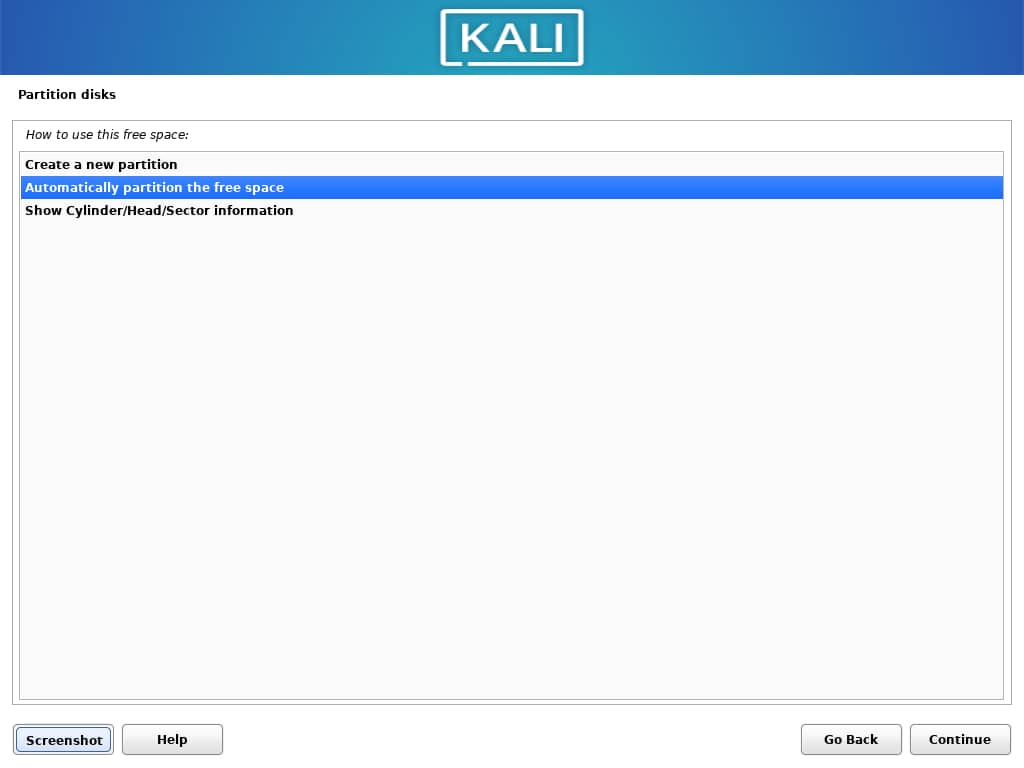
- Choose the newly created free space and click on continue
- Choose “Automatically partition the free space”
Wait for the system to complete installation and you will be ready to boot into your new Kali machine.
When prompted to install GRUB, click the partition where your Windows operating system resides and click continue.
When the setup has been completed, remove the installation and reboot the device.
Boot into your new Kali OS
The system will boot automatically to Kali Linux. If you need to boot into your Windows system, choose it on the GRUB bootloader screen. You may also need to set up a printing service on a new installation if you are ever gonna need it.
FAQs
What is the recommended partition size for Kali Linux?
The recommended partition size for Kali Linux depends on your specific use case and storage requirements. However, a general recommendation is to allocate at least 20-30 GB for the root partition and a separate partition for the home directory.
A space of 20-30 GB will provide enough space for the operating system and additional software, as well as user files and data. Keep in mind that the partition sizes may vary depending on the number and size of installed packages, as well as the amount of data you plan to store.
Additionally, you may want to create a separate partition for your home directory to store your personal files and data. The partition sizes may vary depending on your usage, but it’s generally a good practice to allocate enough space to avoid running out of disk space.
Kali Linux Boot Windows 10 Not Working? Try these…
- Disable Secure Boot: Secure Boot is a security feature in Windows 10 that prevents unsigned operating systems from booting. You may need to disable it in your system’s UEFI/BIOS settings to allow Kali Linux to boot.
- Repair the boot loader: If your boot loader is corrupted, you may need to repair it. This can typically be done using the Kali Linux live USB or CD and boot-repair.
How to repair the boot loader using a Kali Linux live USB
Follow these steps to repair a boot loader that is making your Kali Linux or Windows 10 not reboot:
- Insert the Kali Linux live USB and boot from it. Refer to the section to do this: Boot into your newly-created live USB drive.
- Once you have booted into the live environment, open a terminal window. You can do that by pressing CTRL + ALT + T or finding the Terminal app in the Apps list.
- In your Terminal window, type
sudo grub-install /dev/sdaand press enter. Replacedev/sdawith the partition name of your Kali Linux you created earlier. - Execute the second command:
sudo update-grub - Restart your computer and remove the Kali Linux live USB. Your boot loader should now be repaired and you should be able to boot into Kali Linux or Windows 10 as expected.
And that’s it for this guide and I hope to see you guys in my next tutorial. If it is your first time using Kali Linux, I recommend that you check this article:
How can beginners learn to code on Linux?
It has a guided introduction to using Linux and installing common applications.
OR: Why not take a course that introduces you to the ins and outs of Kali Linux? Follow this link: Kali Linux Tutorial for Beginners


